
Father's day just around the corner, and unfortunately, my dad does not get celebrated enough as we do not have Father's day in Hungary.
Since I live in the UK every year, I make sure that both of my parents mum and dad equally feel appreciated on these holidays.
My dad is a simple guy, super easy to find or make presents for him, he literally appreciates everything. Even though we cannot agree on many things and no one in this world can change that, we have a super strong connection. One thing is absolutely true when it comes to me and my dad, András. Like Father like daughter.


There are two things my dad loves after his family chocolate and tools.
No joke.
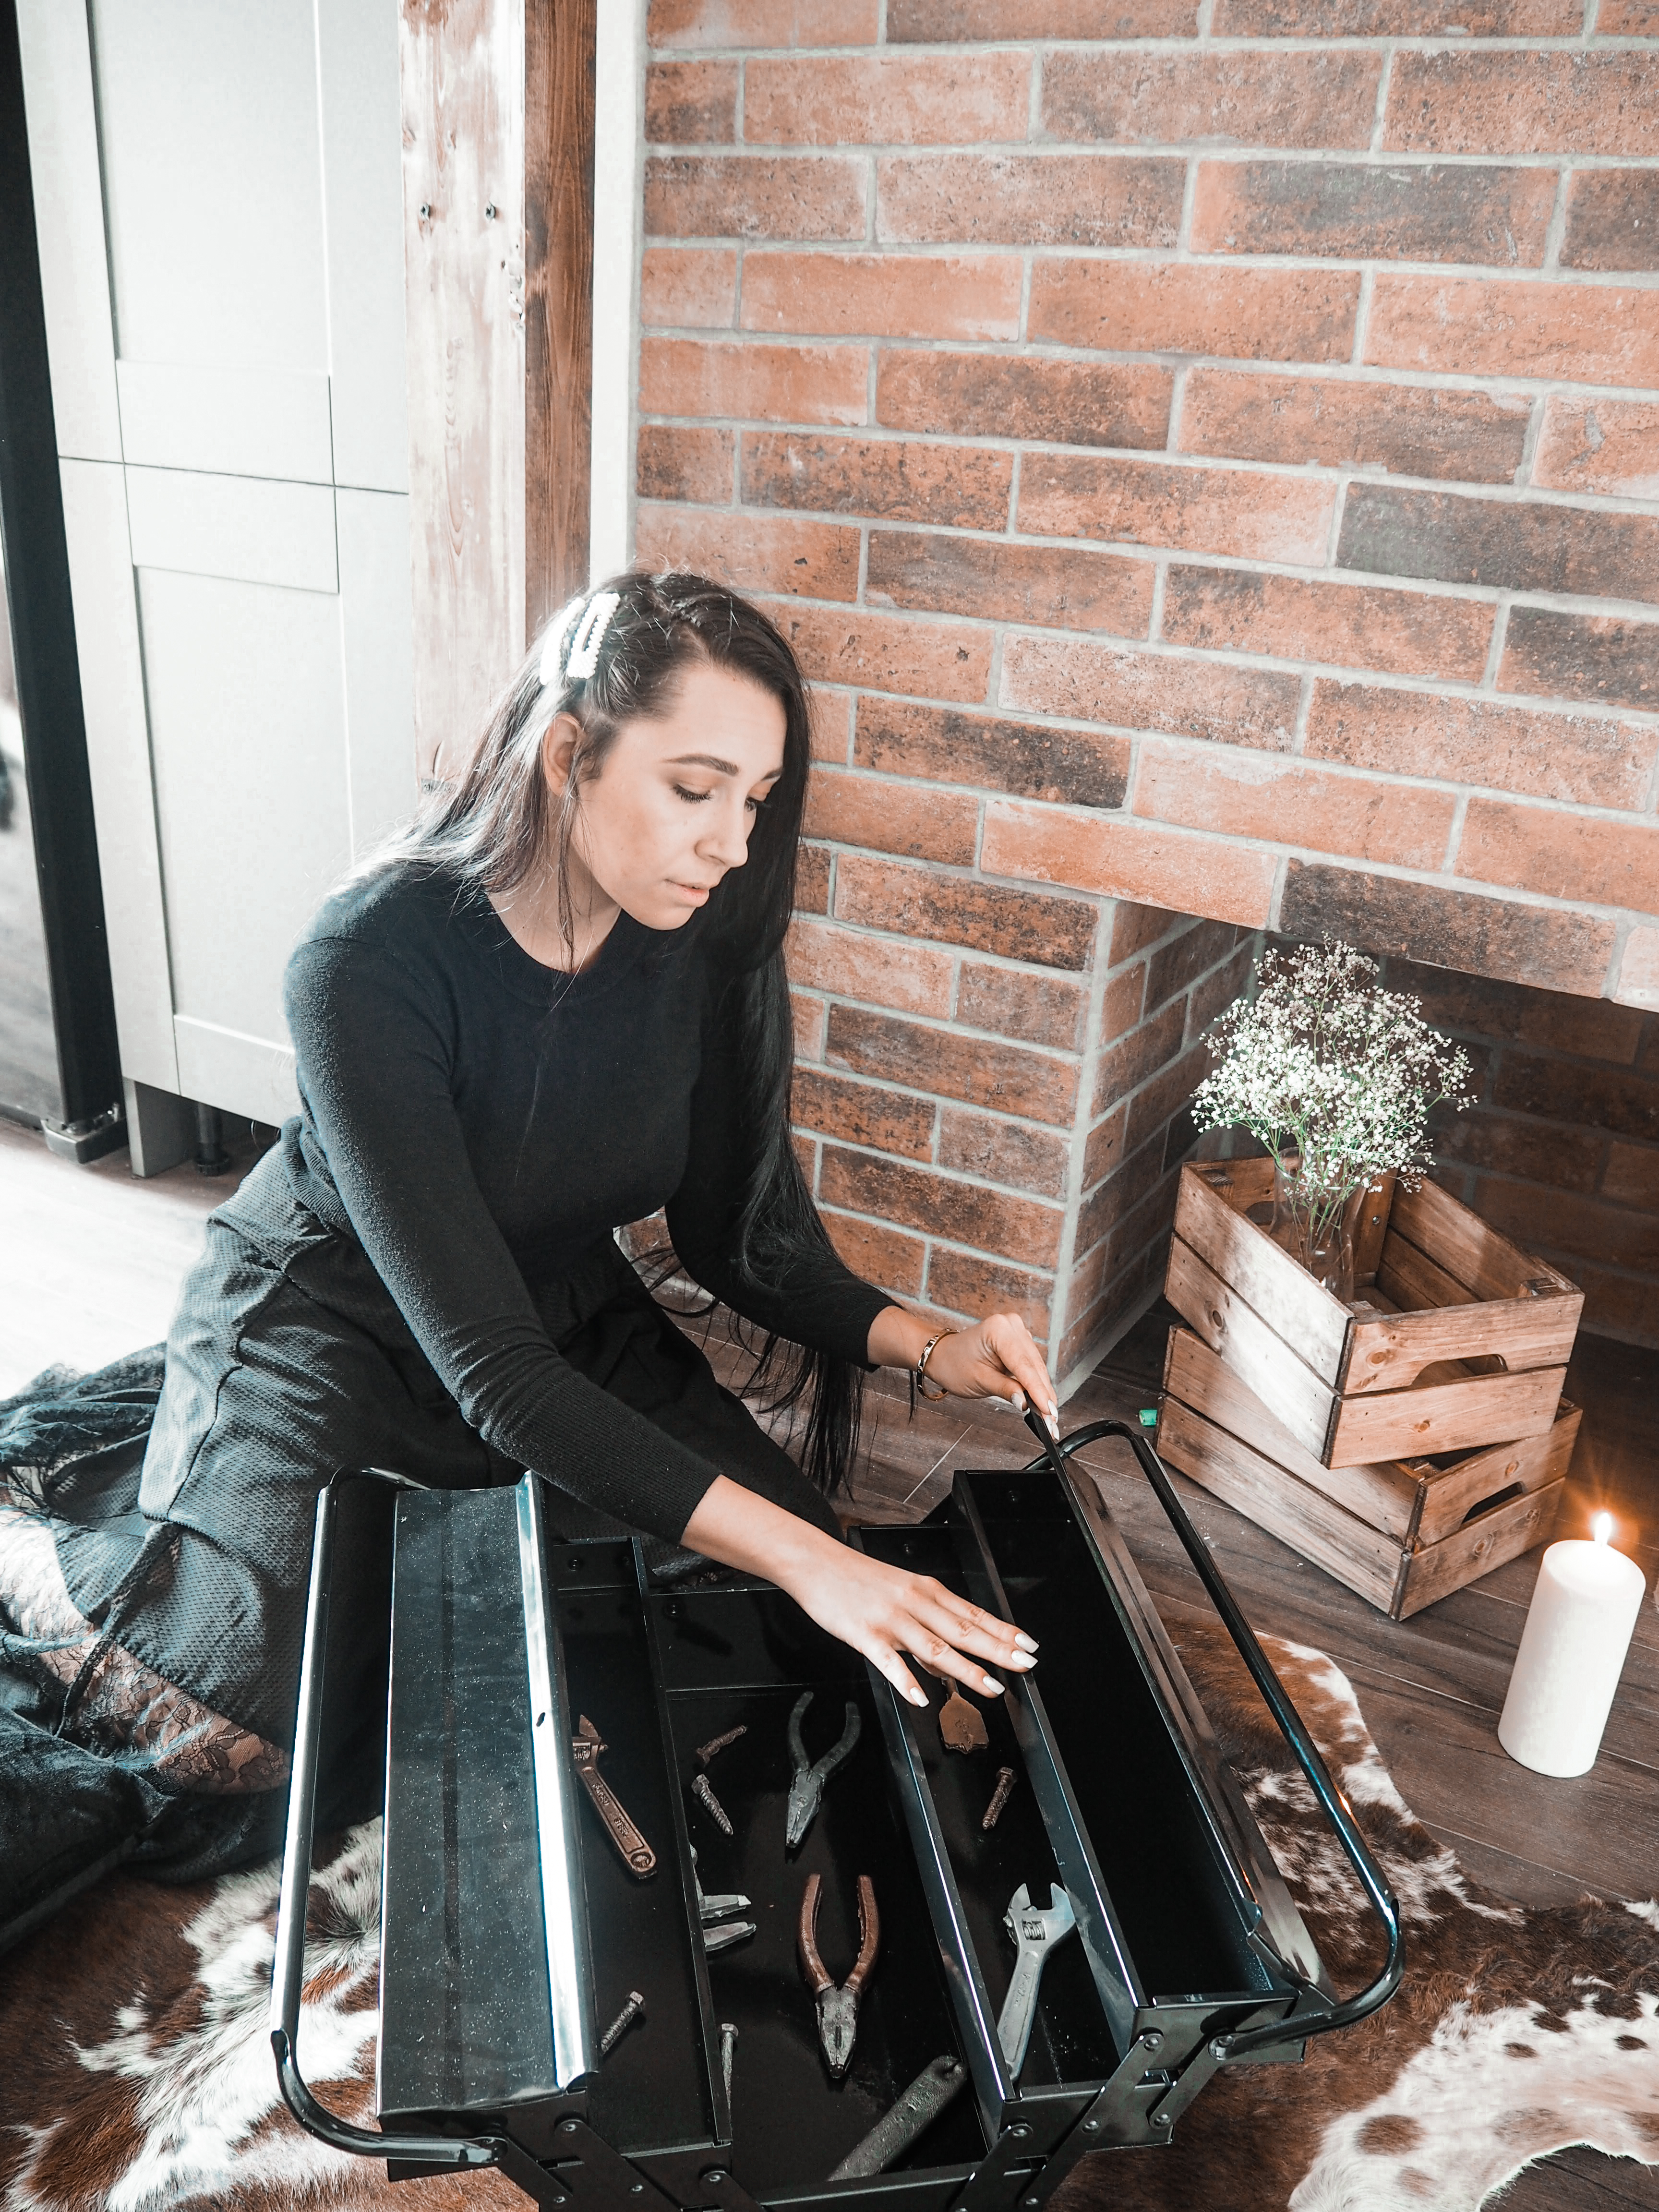
This year I decided to combine two of his favourite things, so I came up with the idea of a chocolate toolbox for him. I know that it will be a massive fight before he eats a bite, he will just try to keep it in his closet forever.
I have seen so many different stores selling these delicious chocolate tools in town. However, they cost a fortune. My dad's birthday is in July which means I have to come up with another great idea as this going to be his first birthday that we celebrate together after 6 years, but that's for another day.
So, before I get myself into this war with my dad, let me show you how to make chocolate tools on a budget.
What you need to make DIY chocolate tools:
Mouldings: You can order tool mouldings from Amazon, or you can make your own one.
If you prefer to make, your own mouldings use the reusable food grade moulding gel. I got the inspiration from howtocookthat she used this gel in her youtube video.
Chocolate:
I used milk chocolate because my dad has a sweet tooth, and he cannot stand dark chocolate. How much chocolate you will need it depends on the number of tools you want to make and their size. I used about 3 bars.
Decoration:
I bought 6 different colours from The craft company.
Bronze lustre dust
Silver lustre dust
Platinum lustre dust
Red lustre dust
Midnight Black lustre dust
Antique Gold lustre dust
Cocoa powder
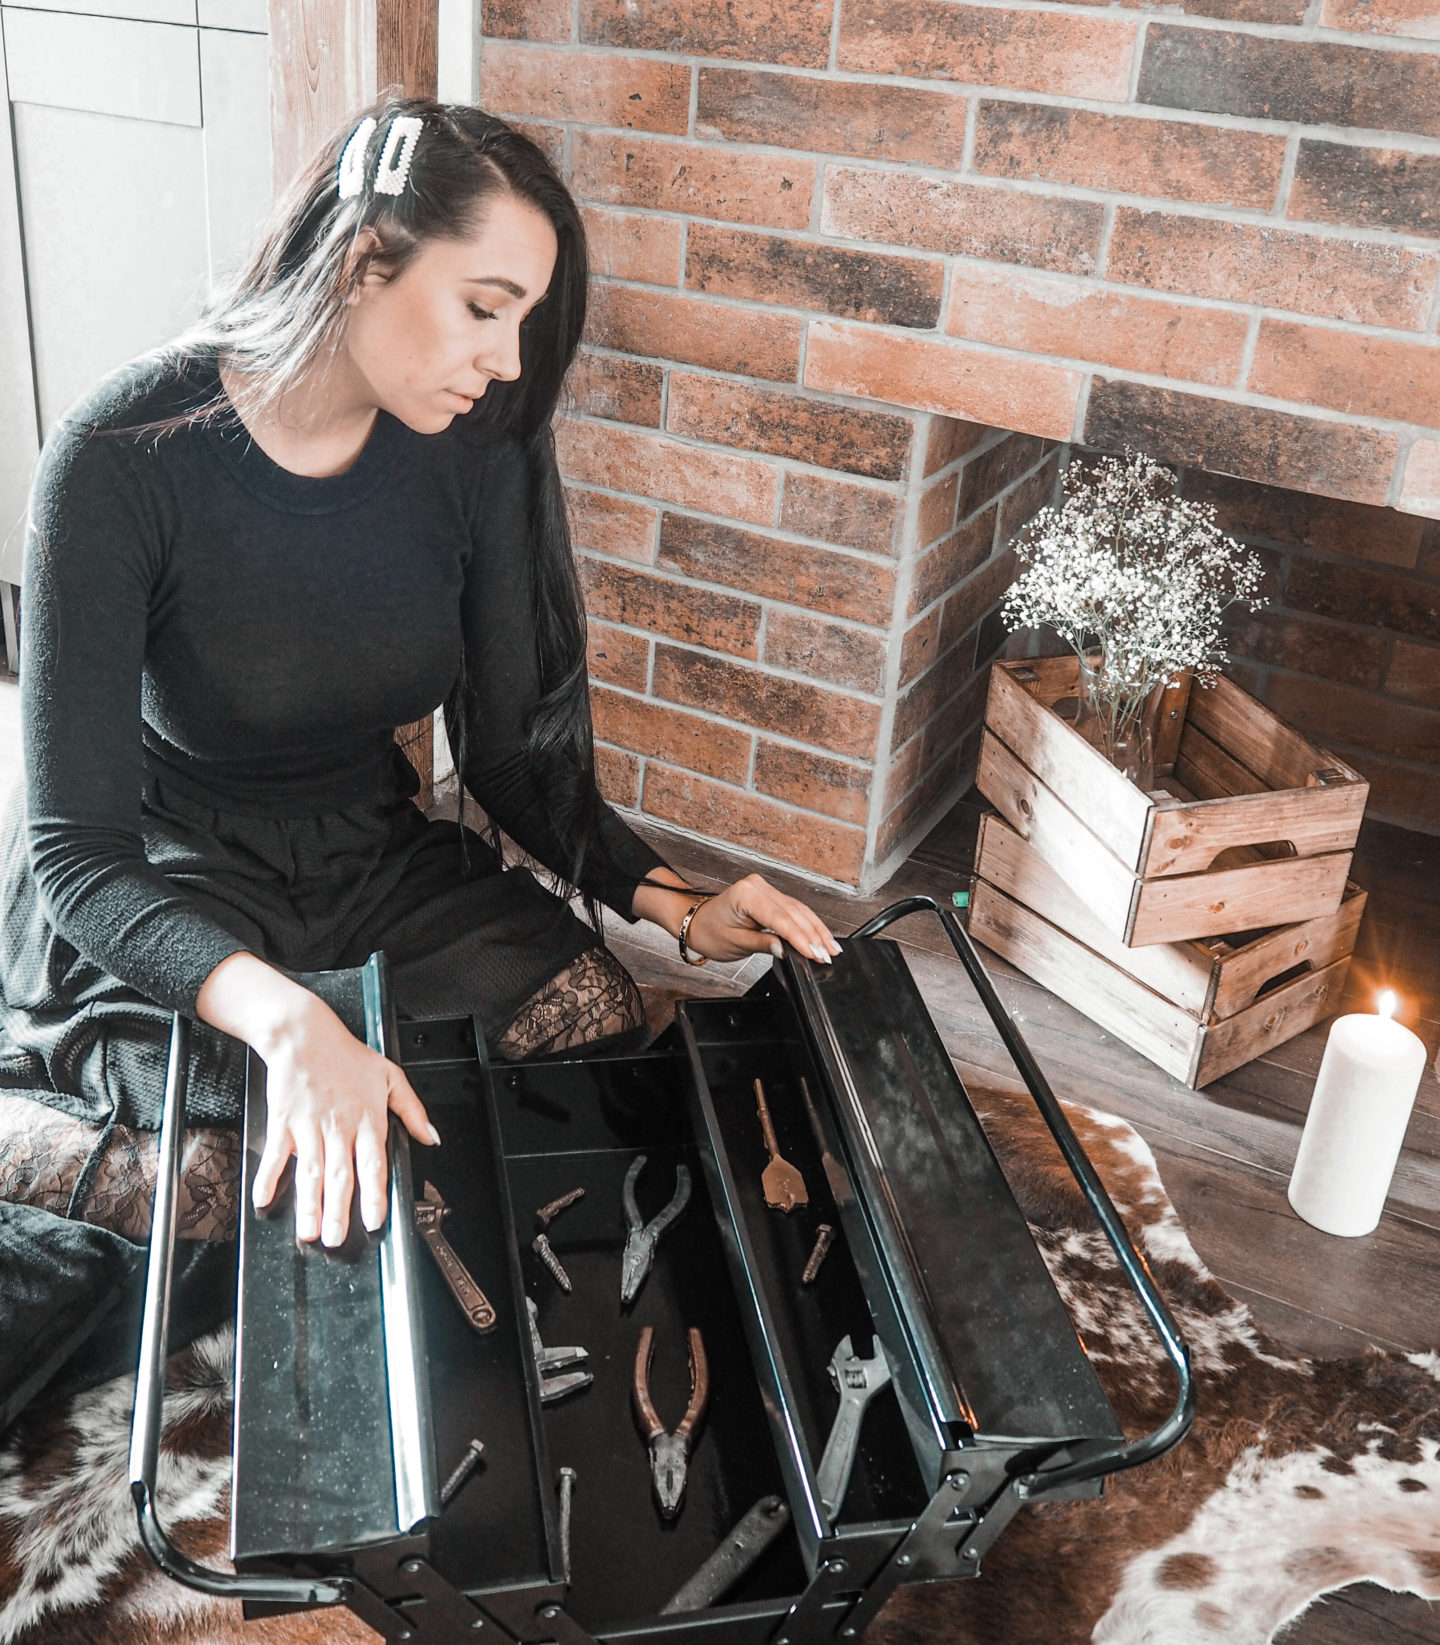
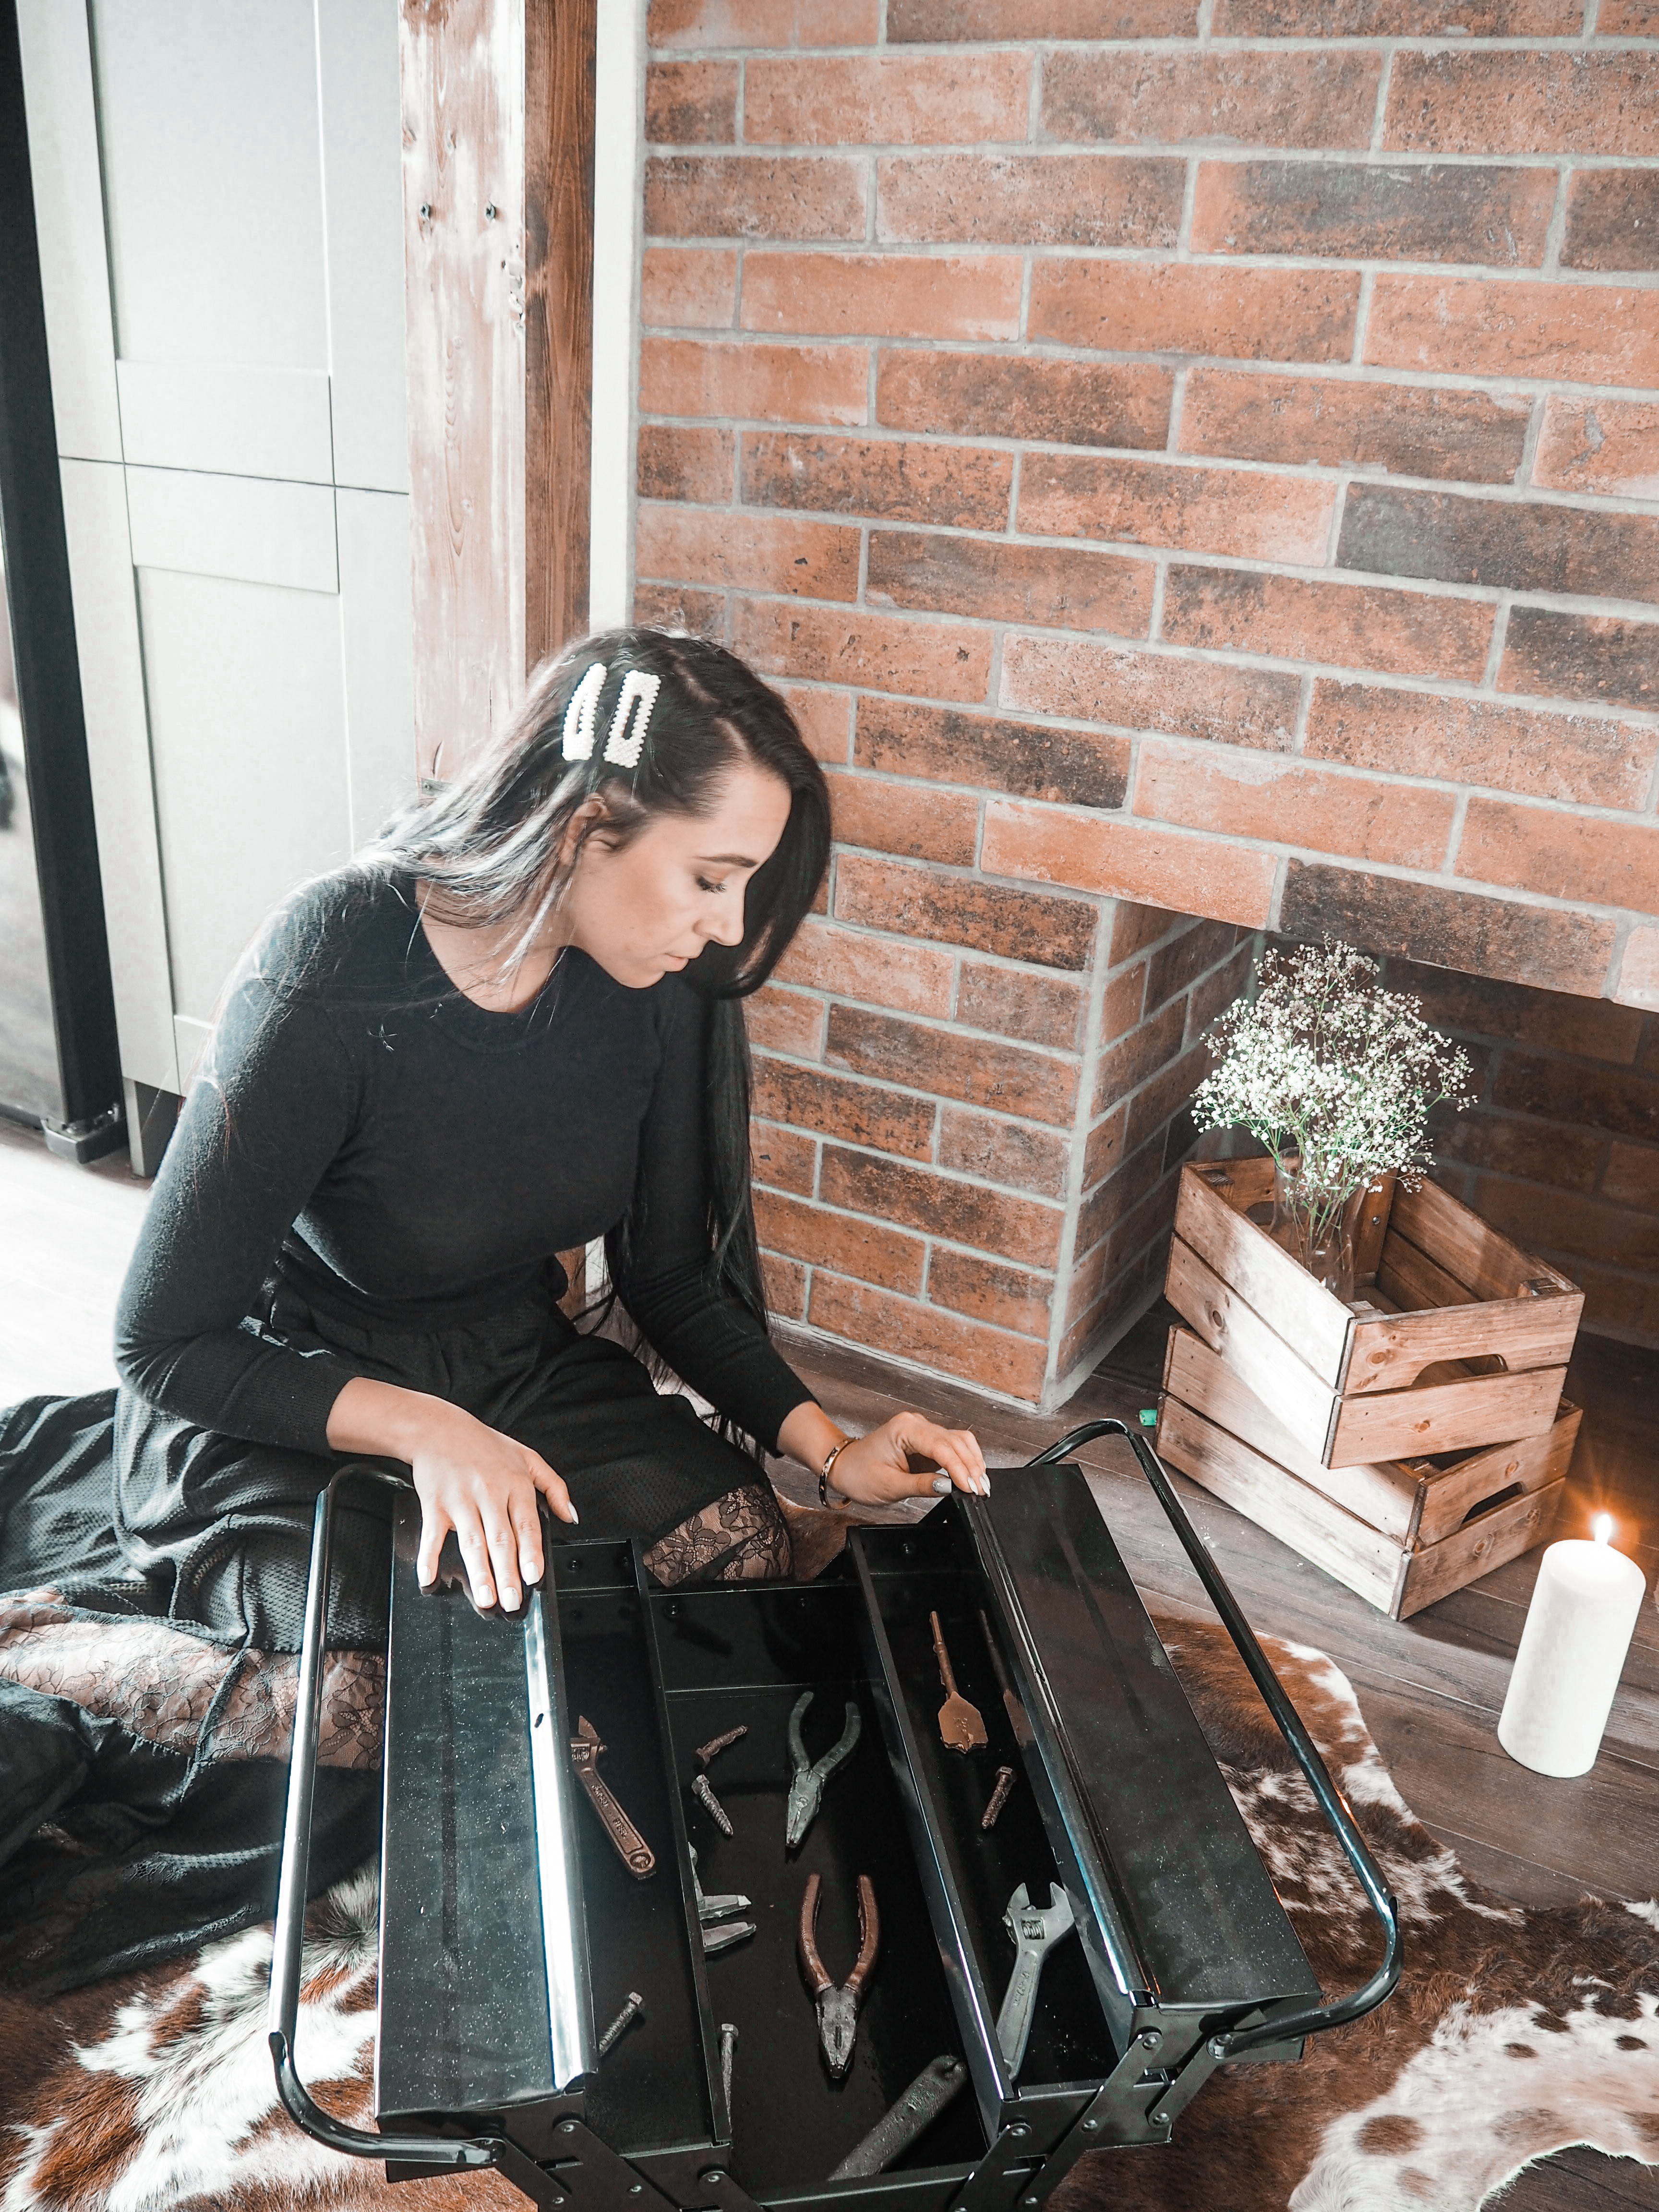
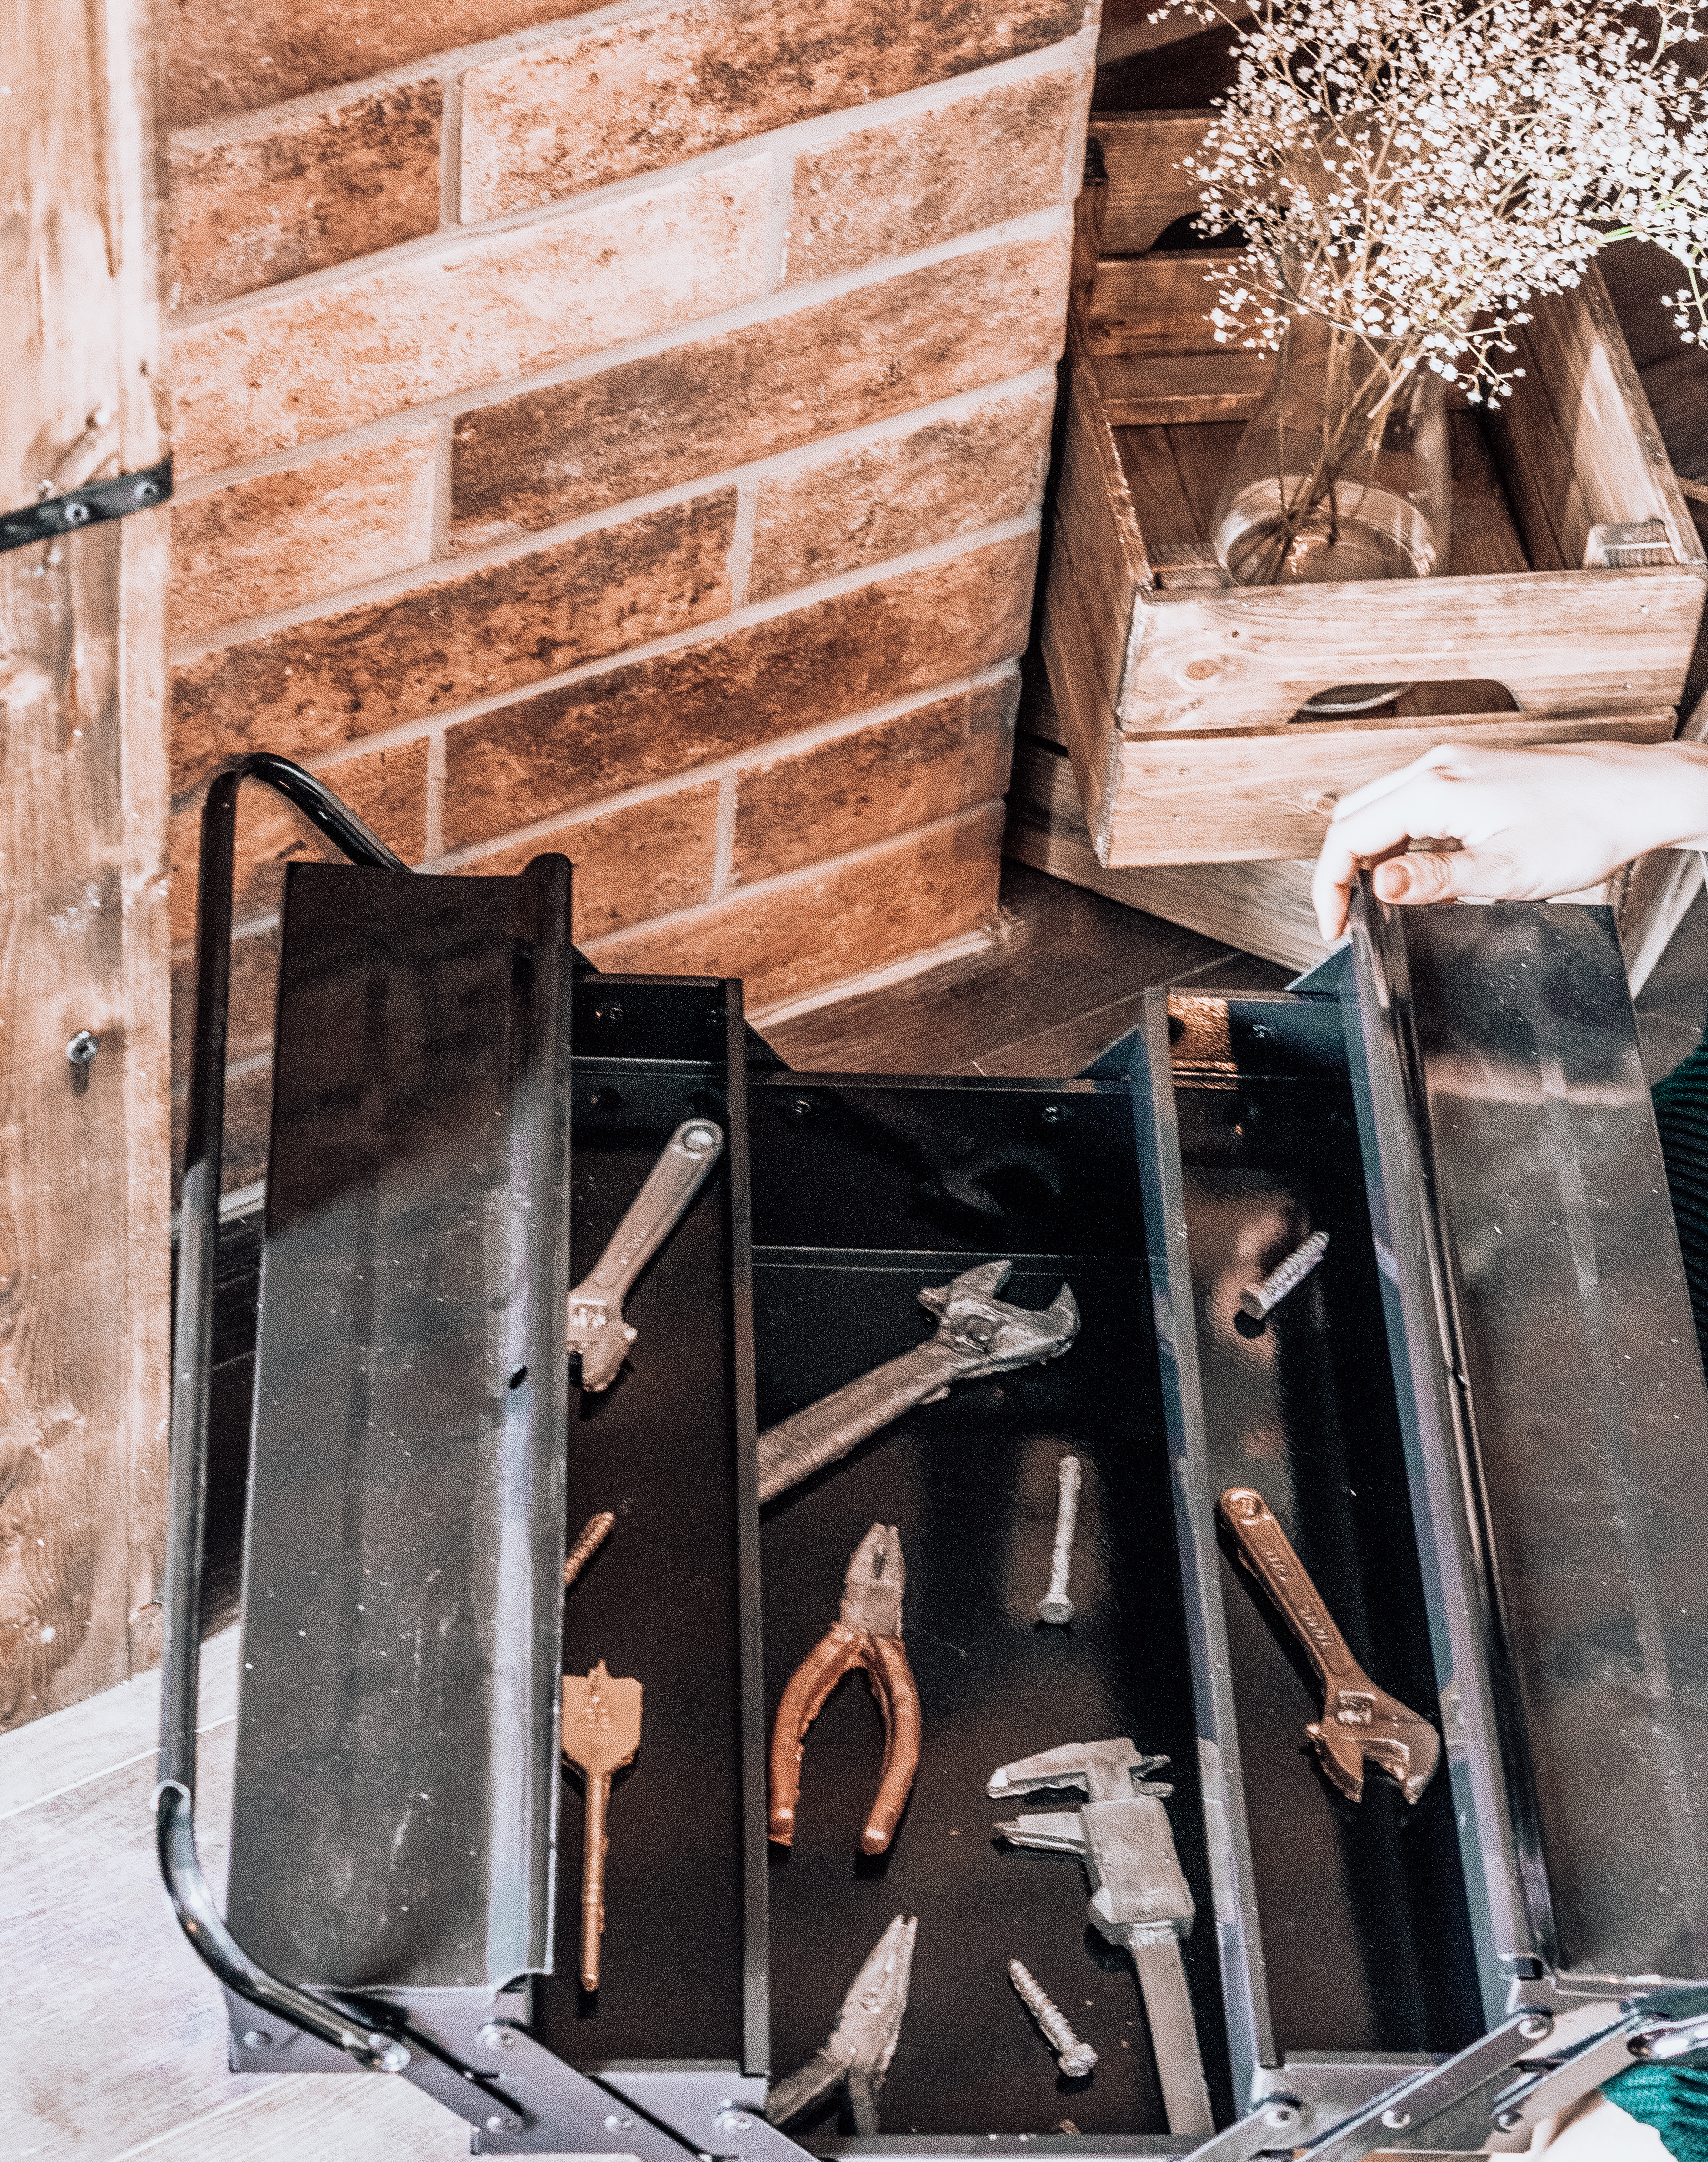
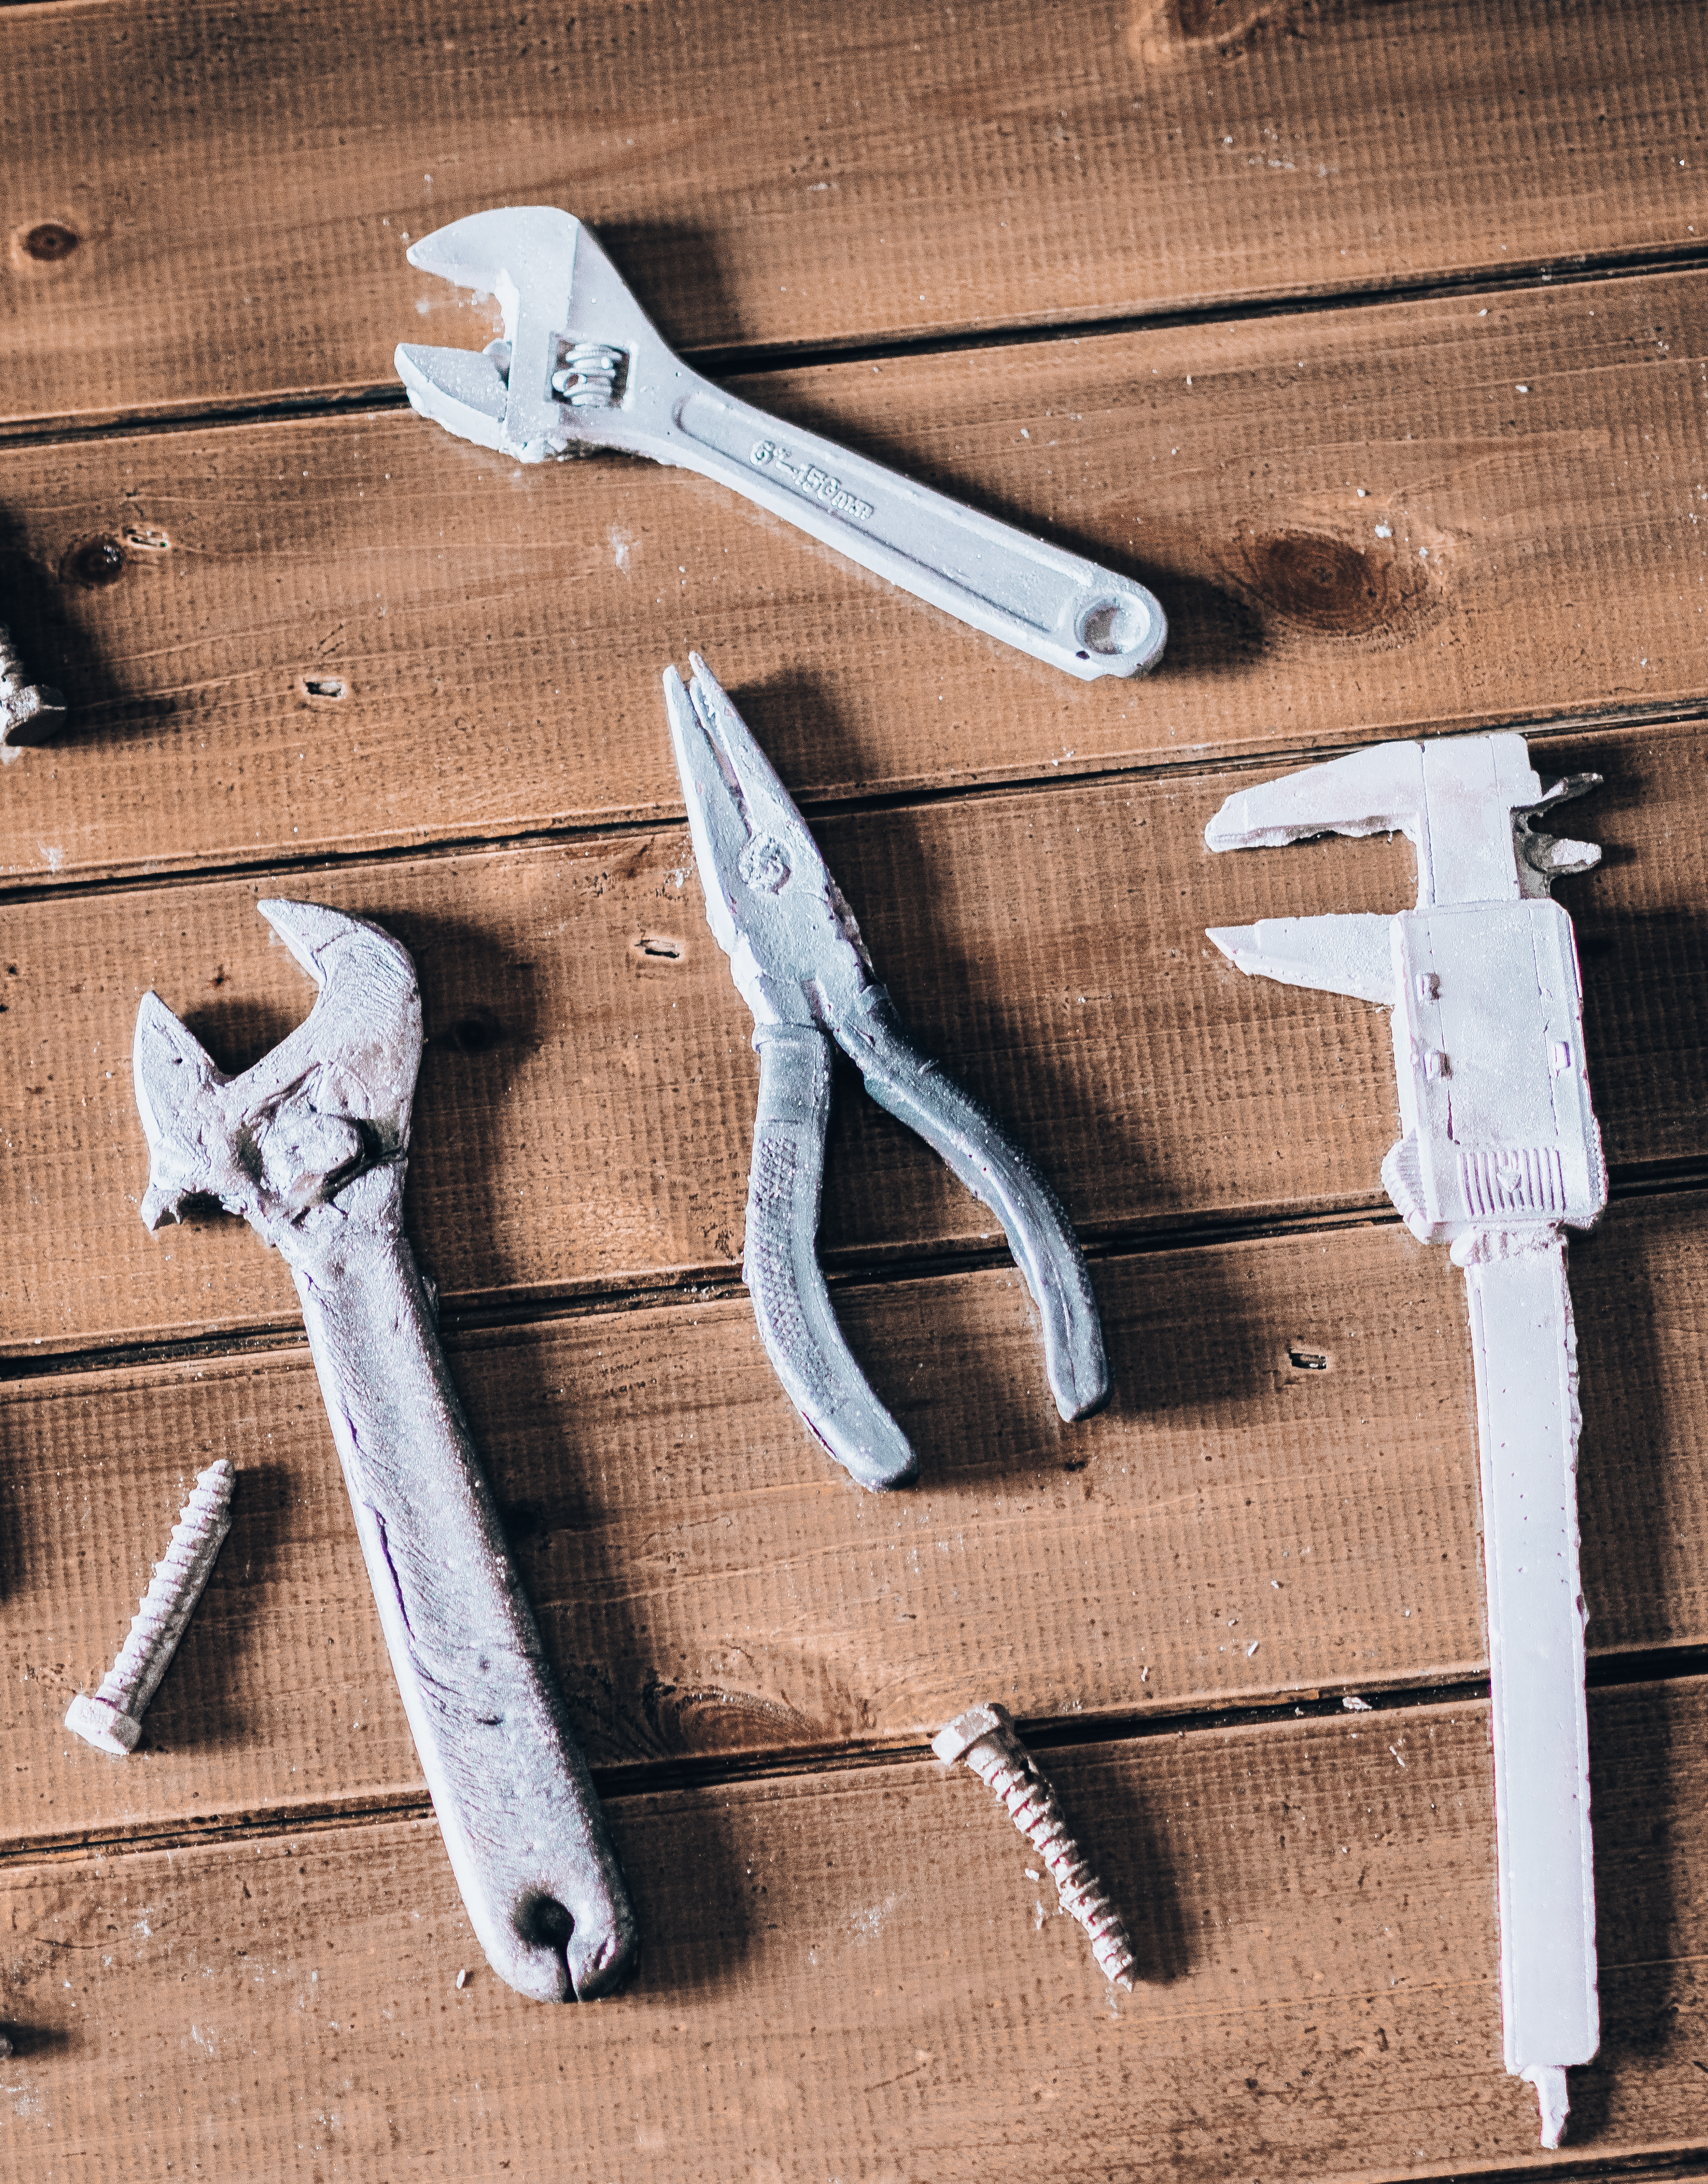
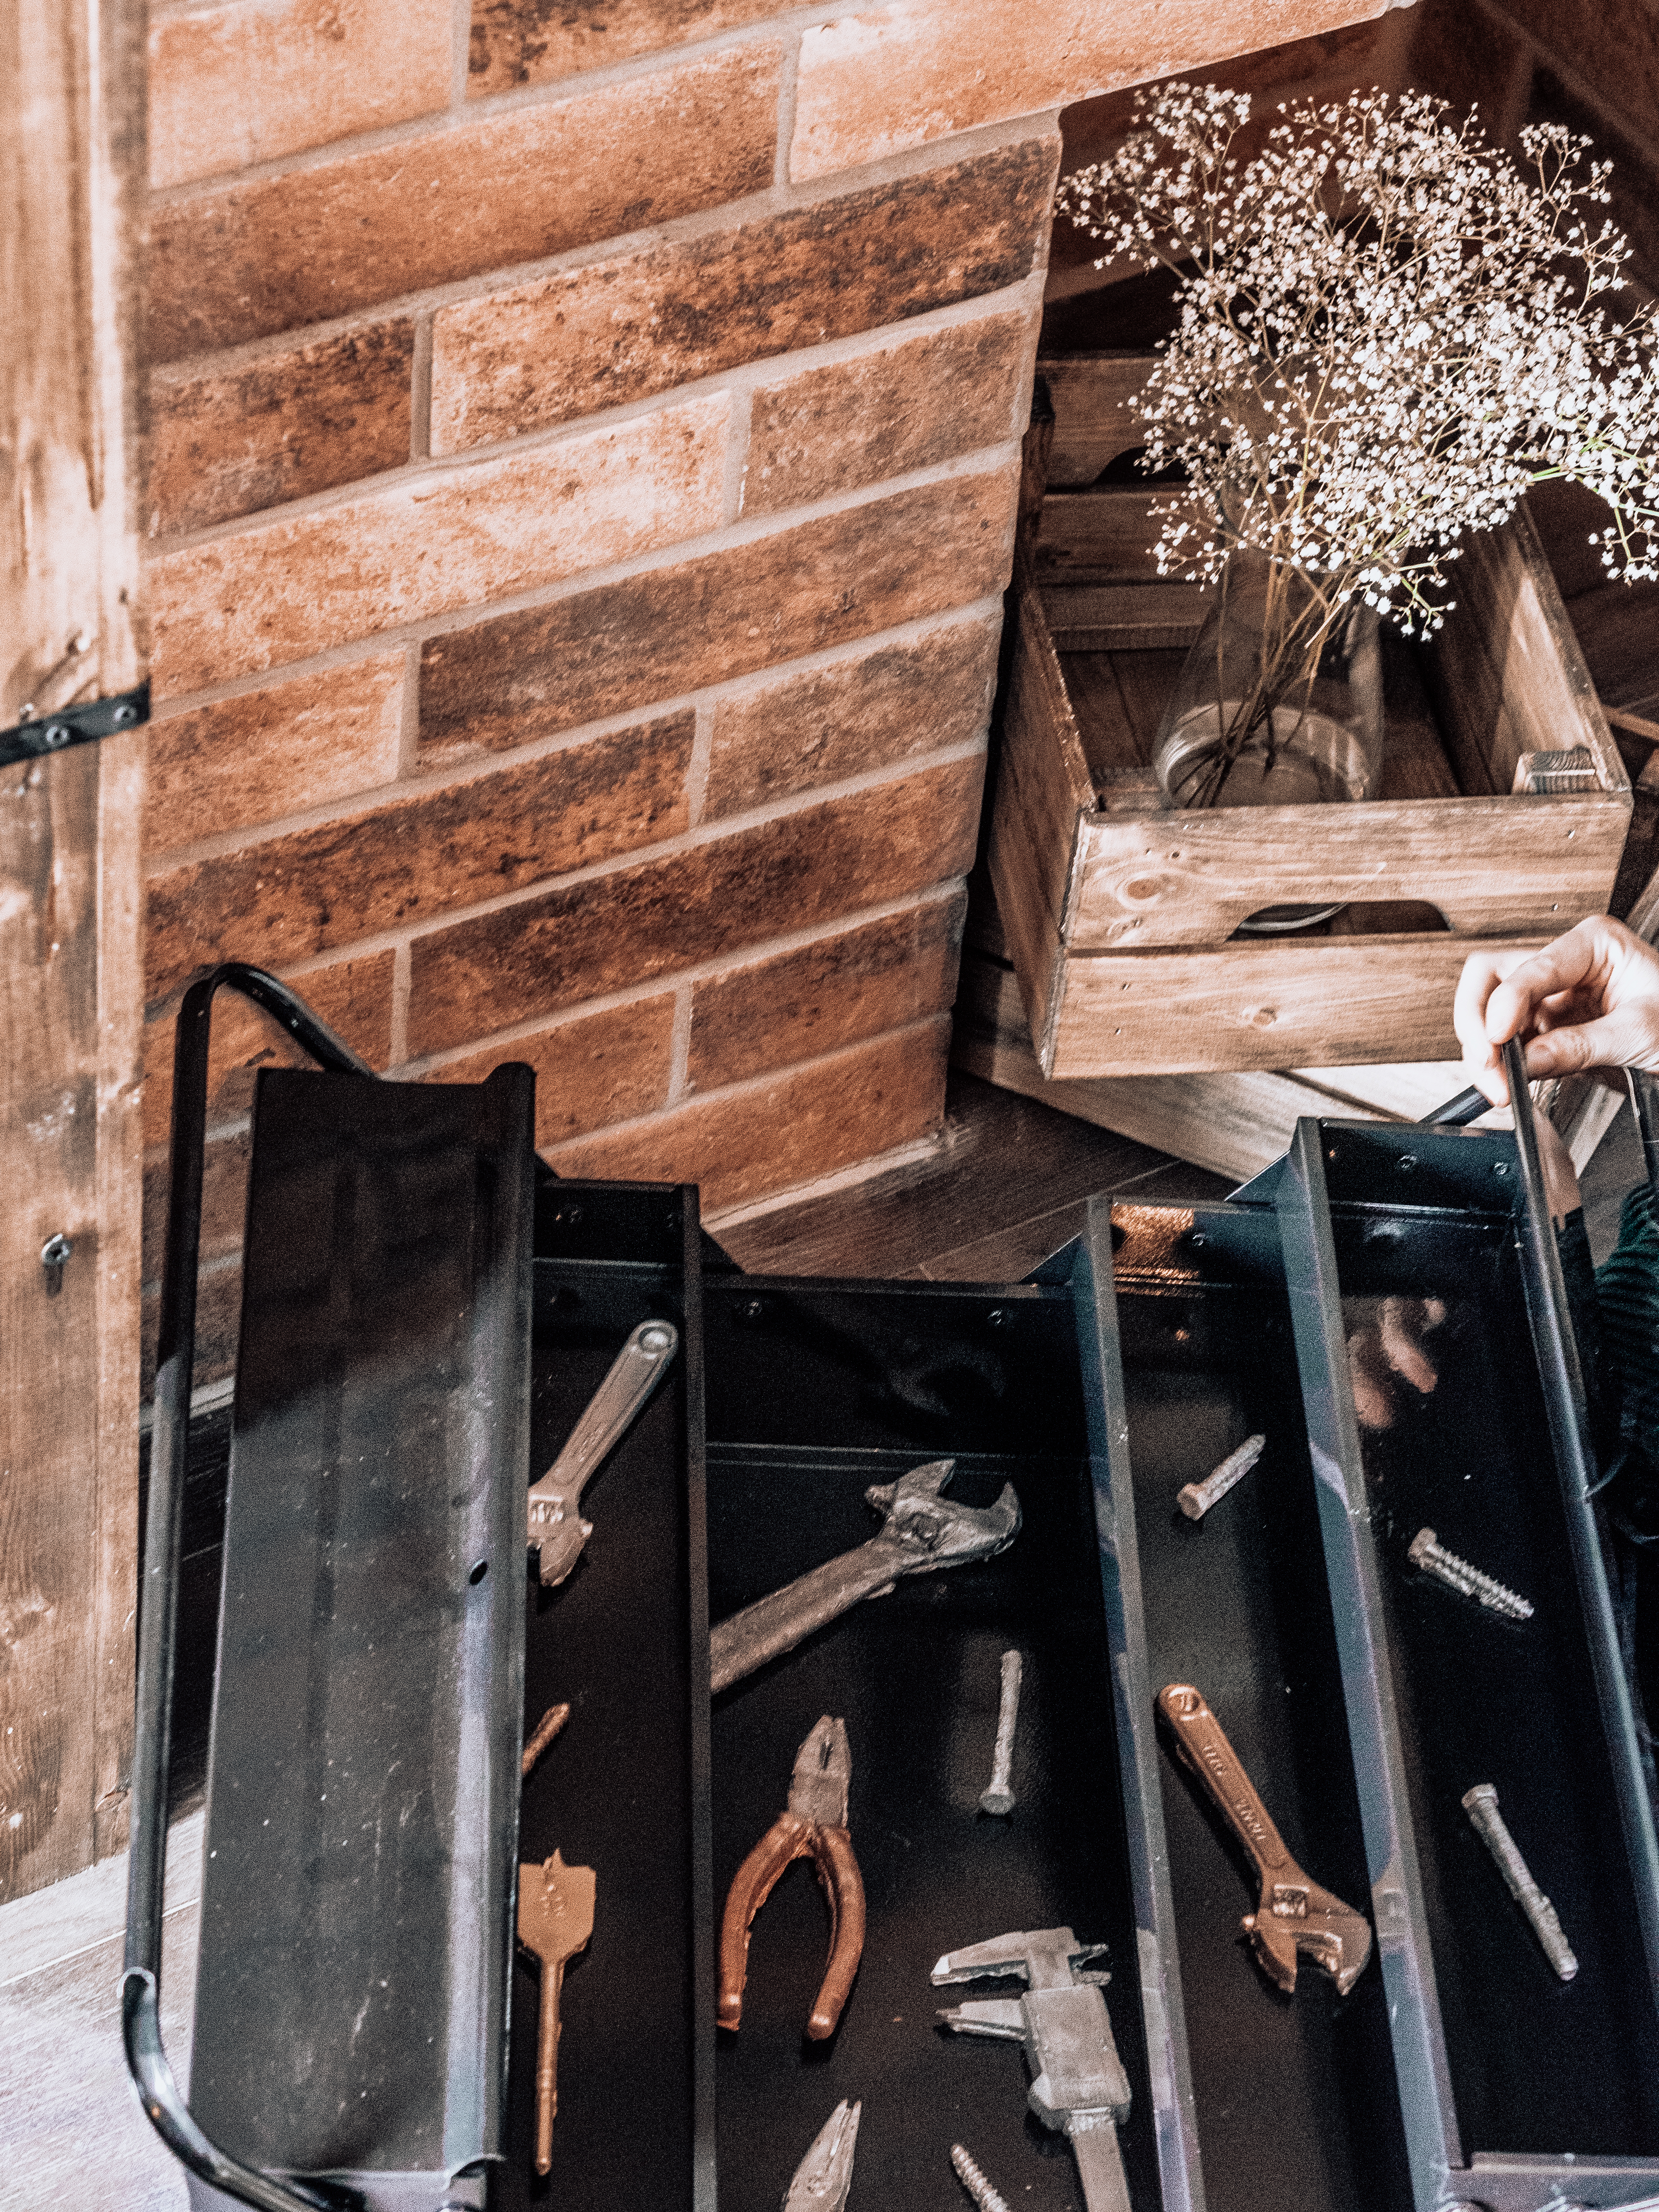
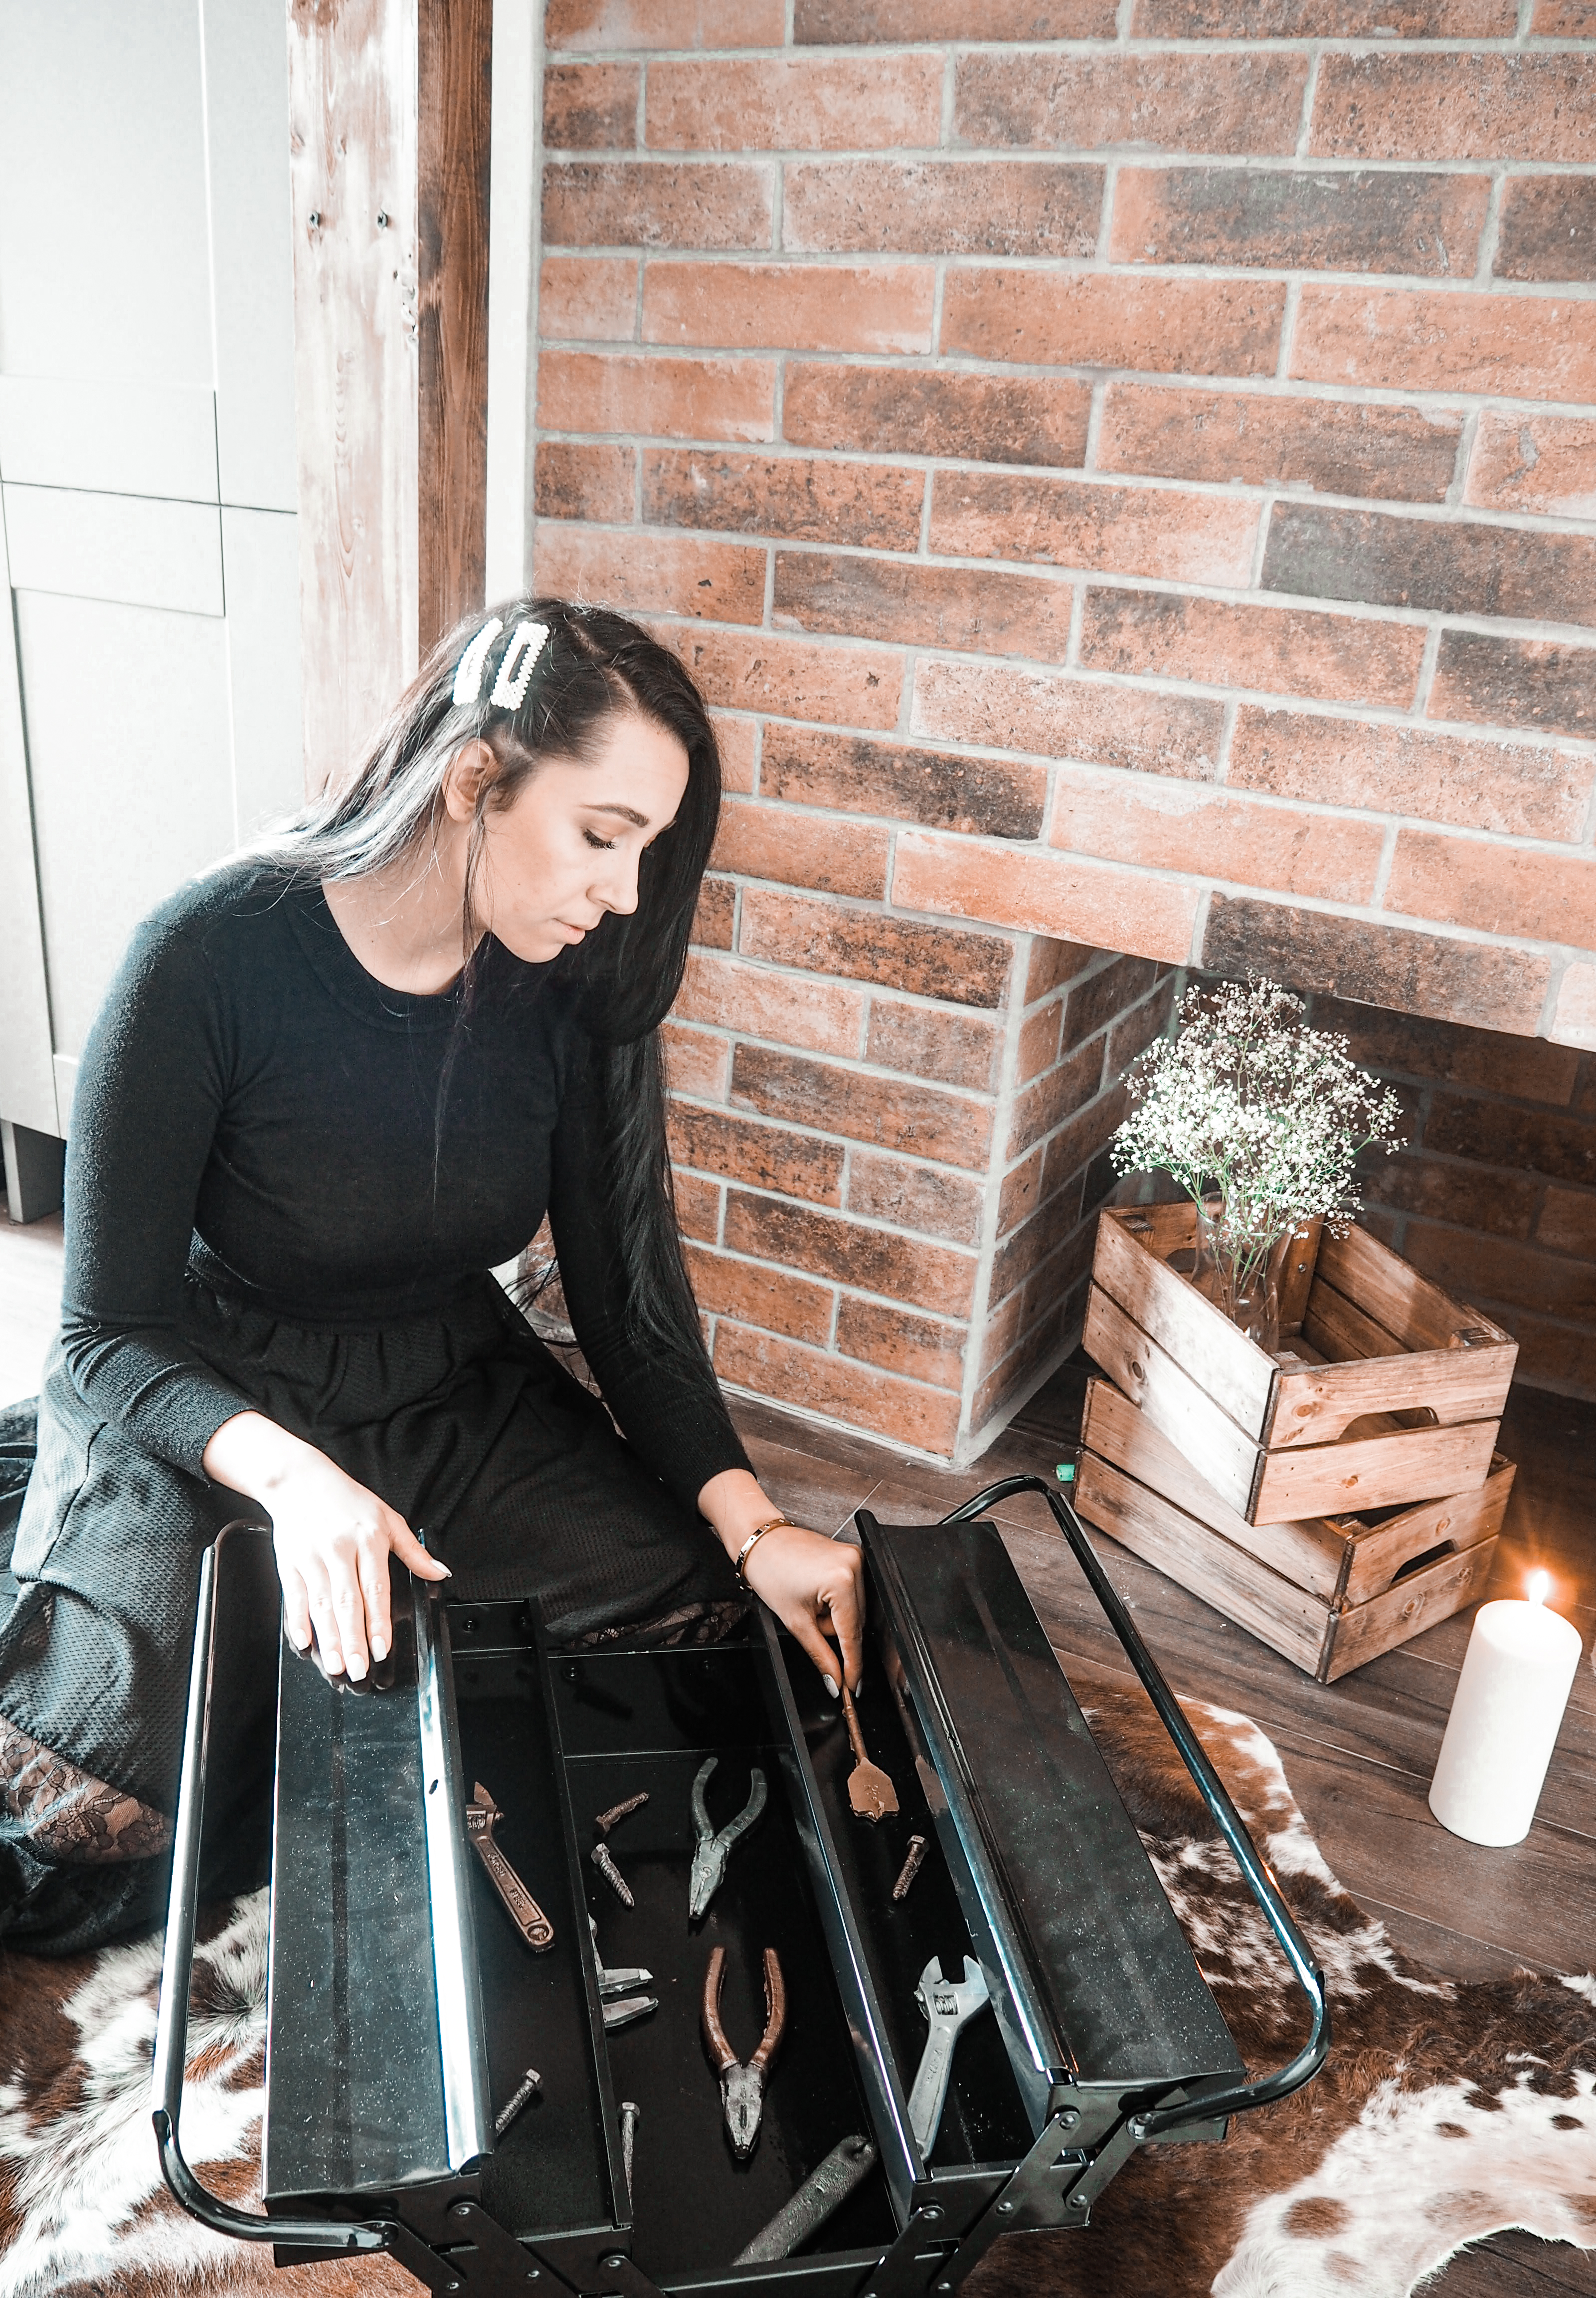
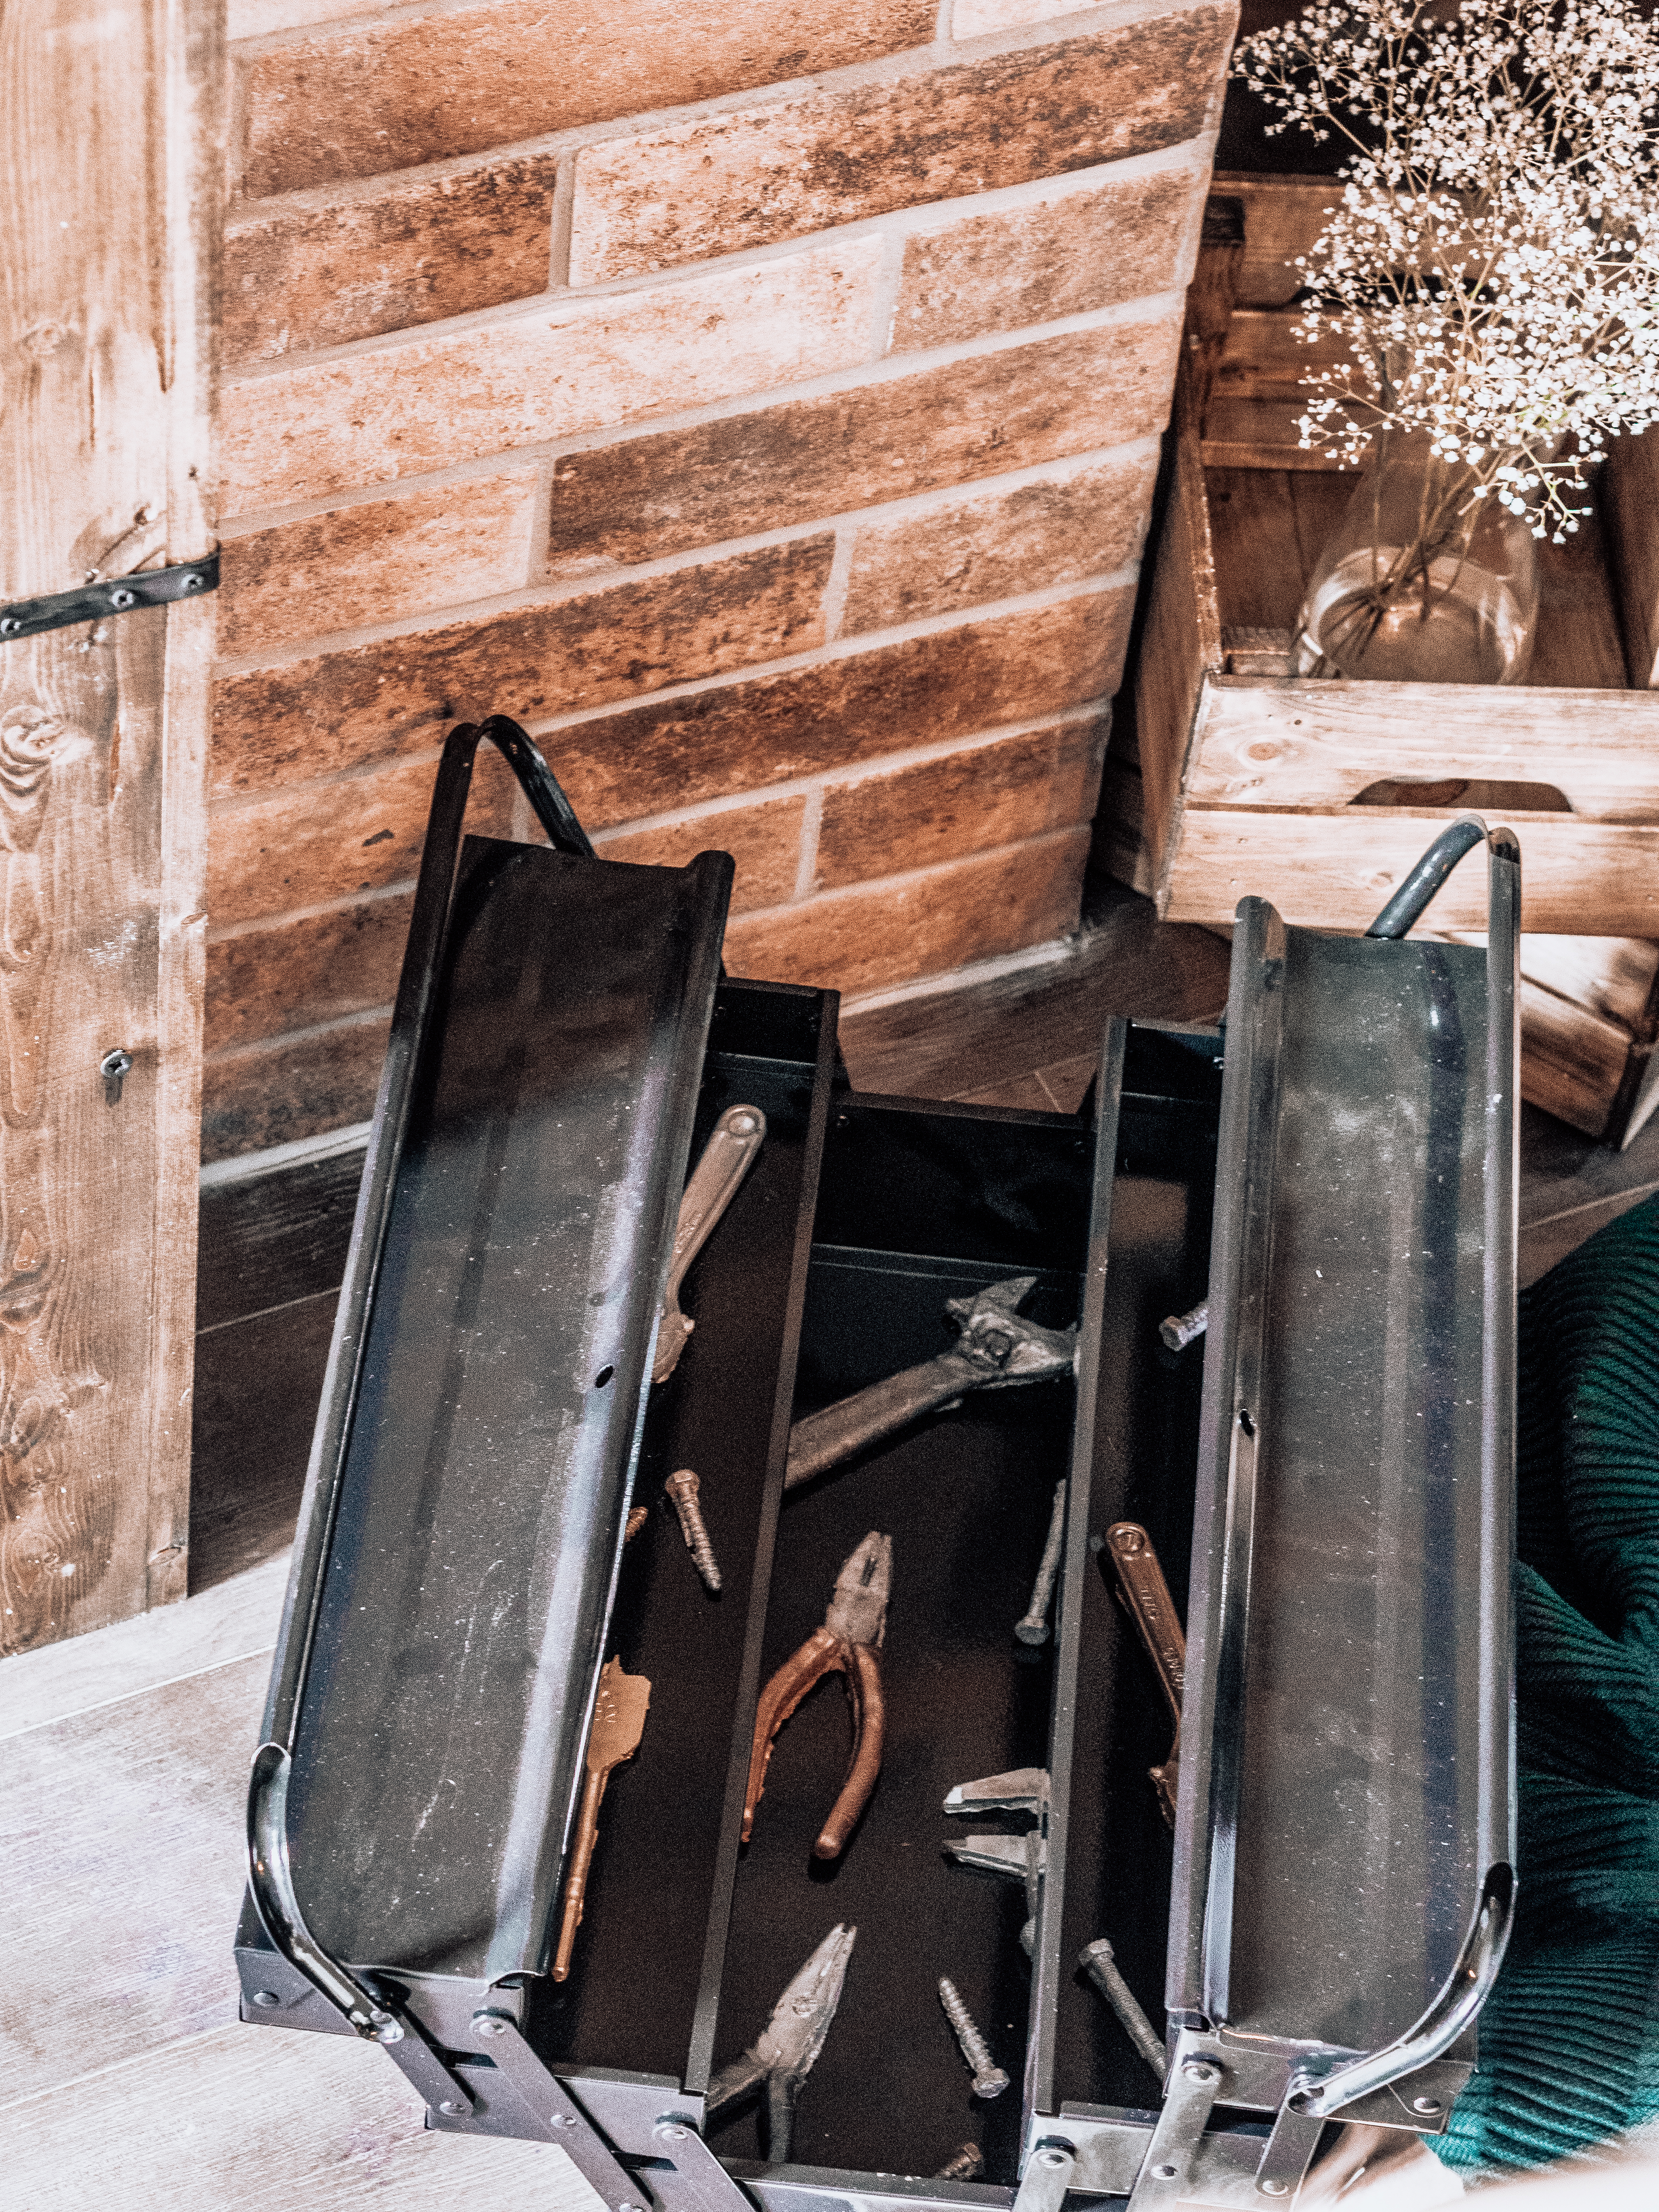
I place my tools into a brand new toolbox. However, you can also use a wooden box.


Inductions:
1) Firstly you need to temper your chocolate. Not sure how?
Click here to read it.
2) Pour your chocolate mix into your moulds. Make sure you bang the moulds on a tabletop to release any air bubbles.
3) Now place your chocolate somewhere cool and allow them to harden.
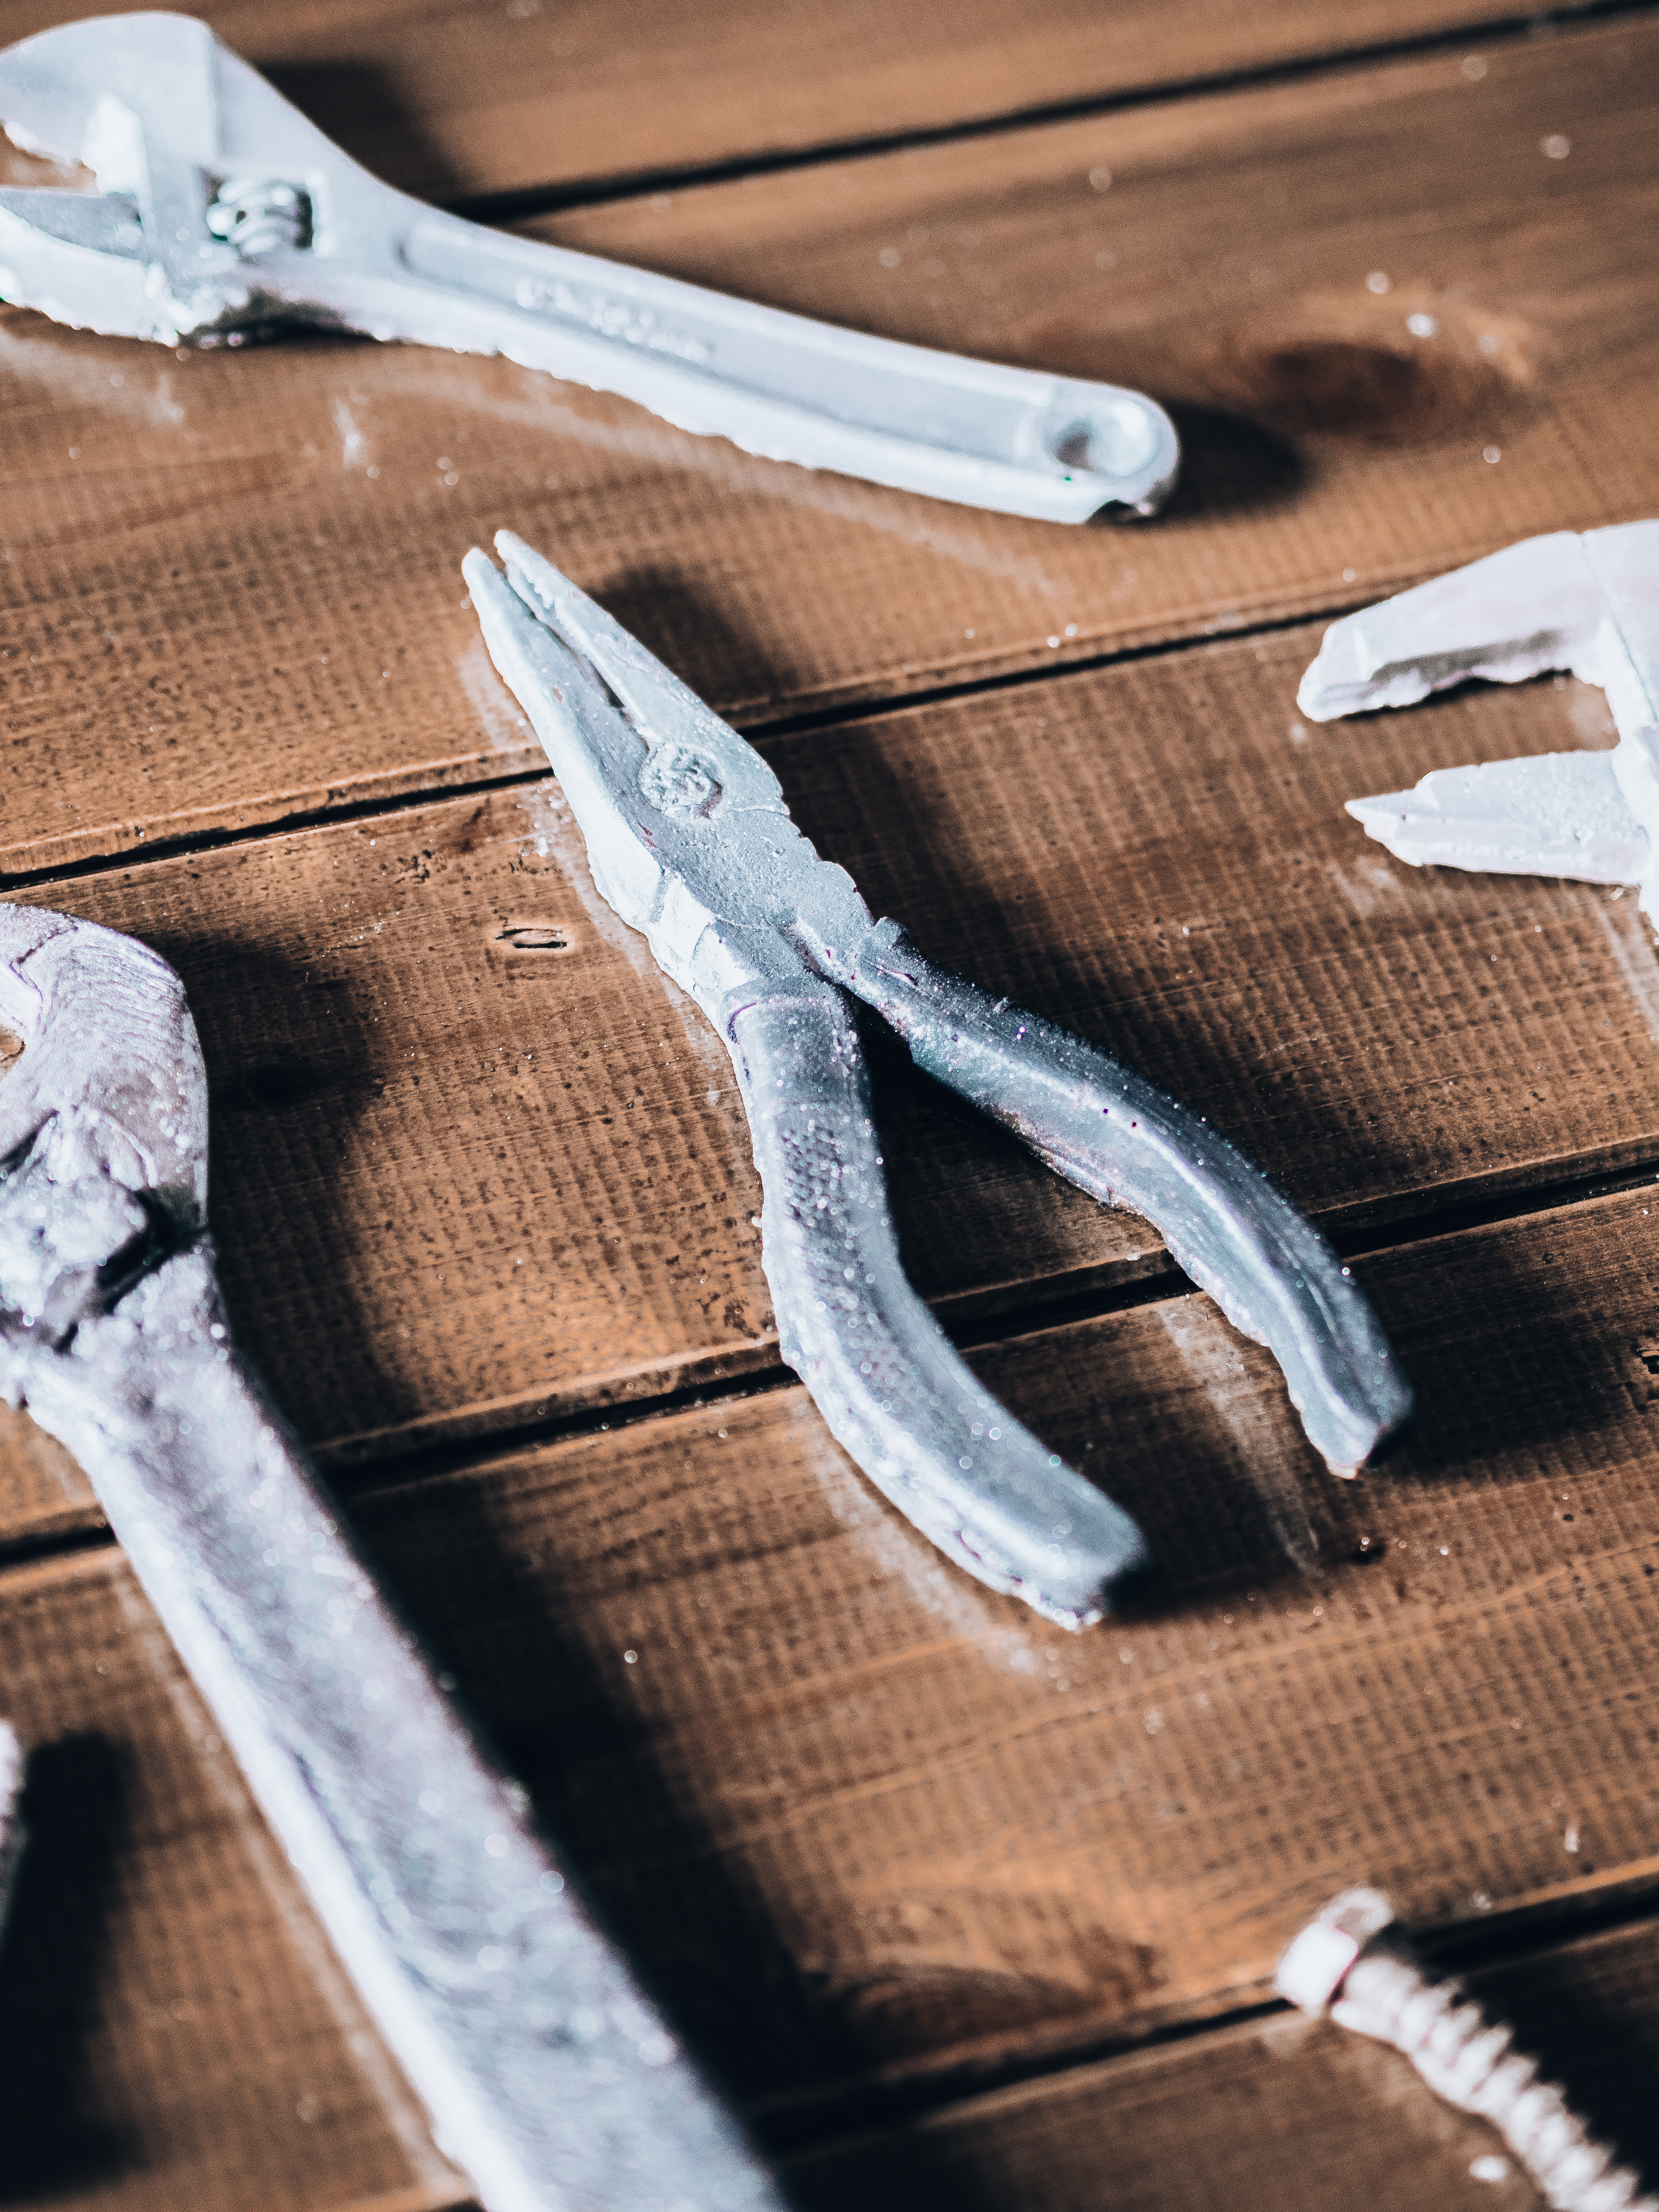
4) Remove the chocolate tool from the mould and place them on your worktop.
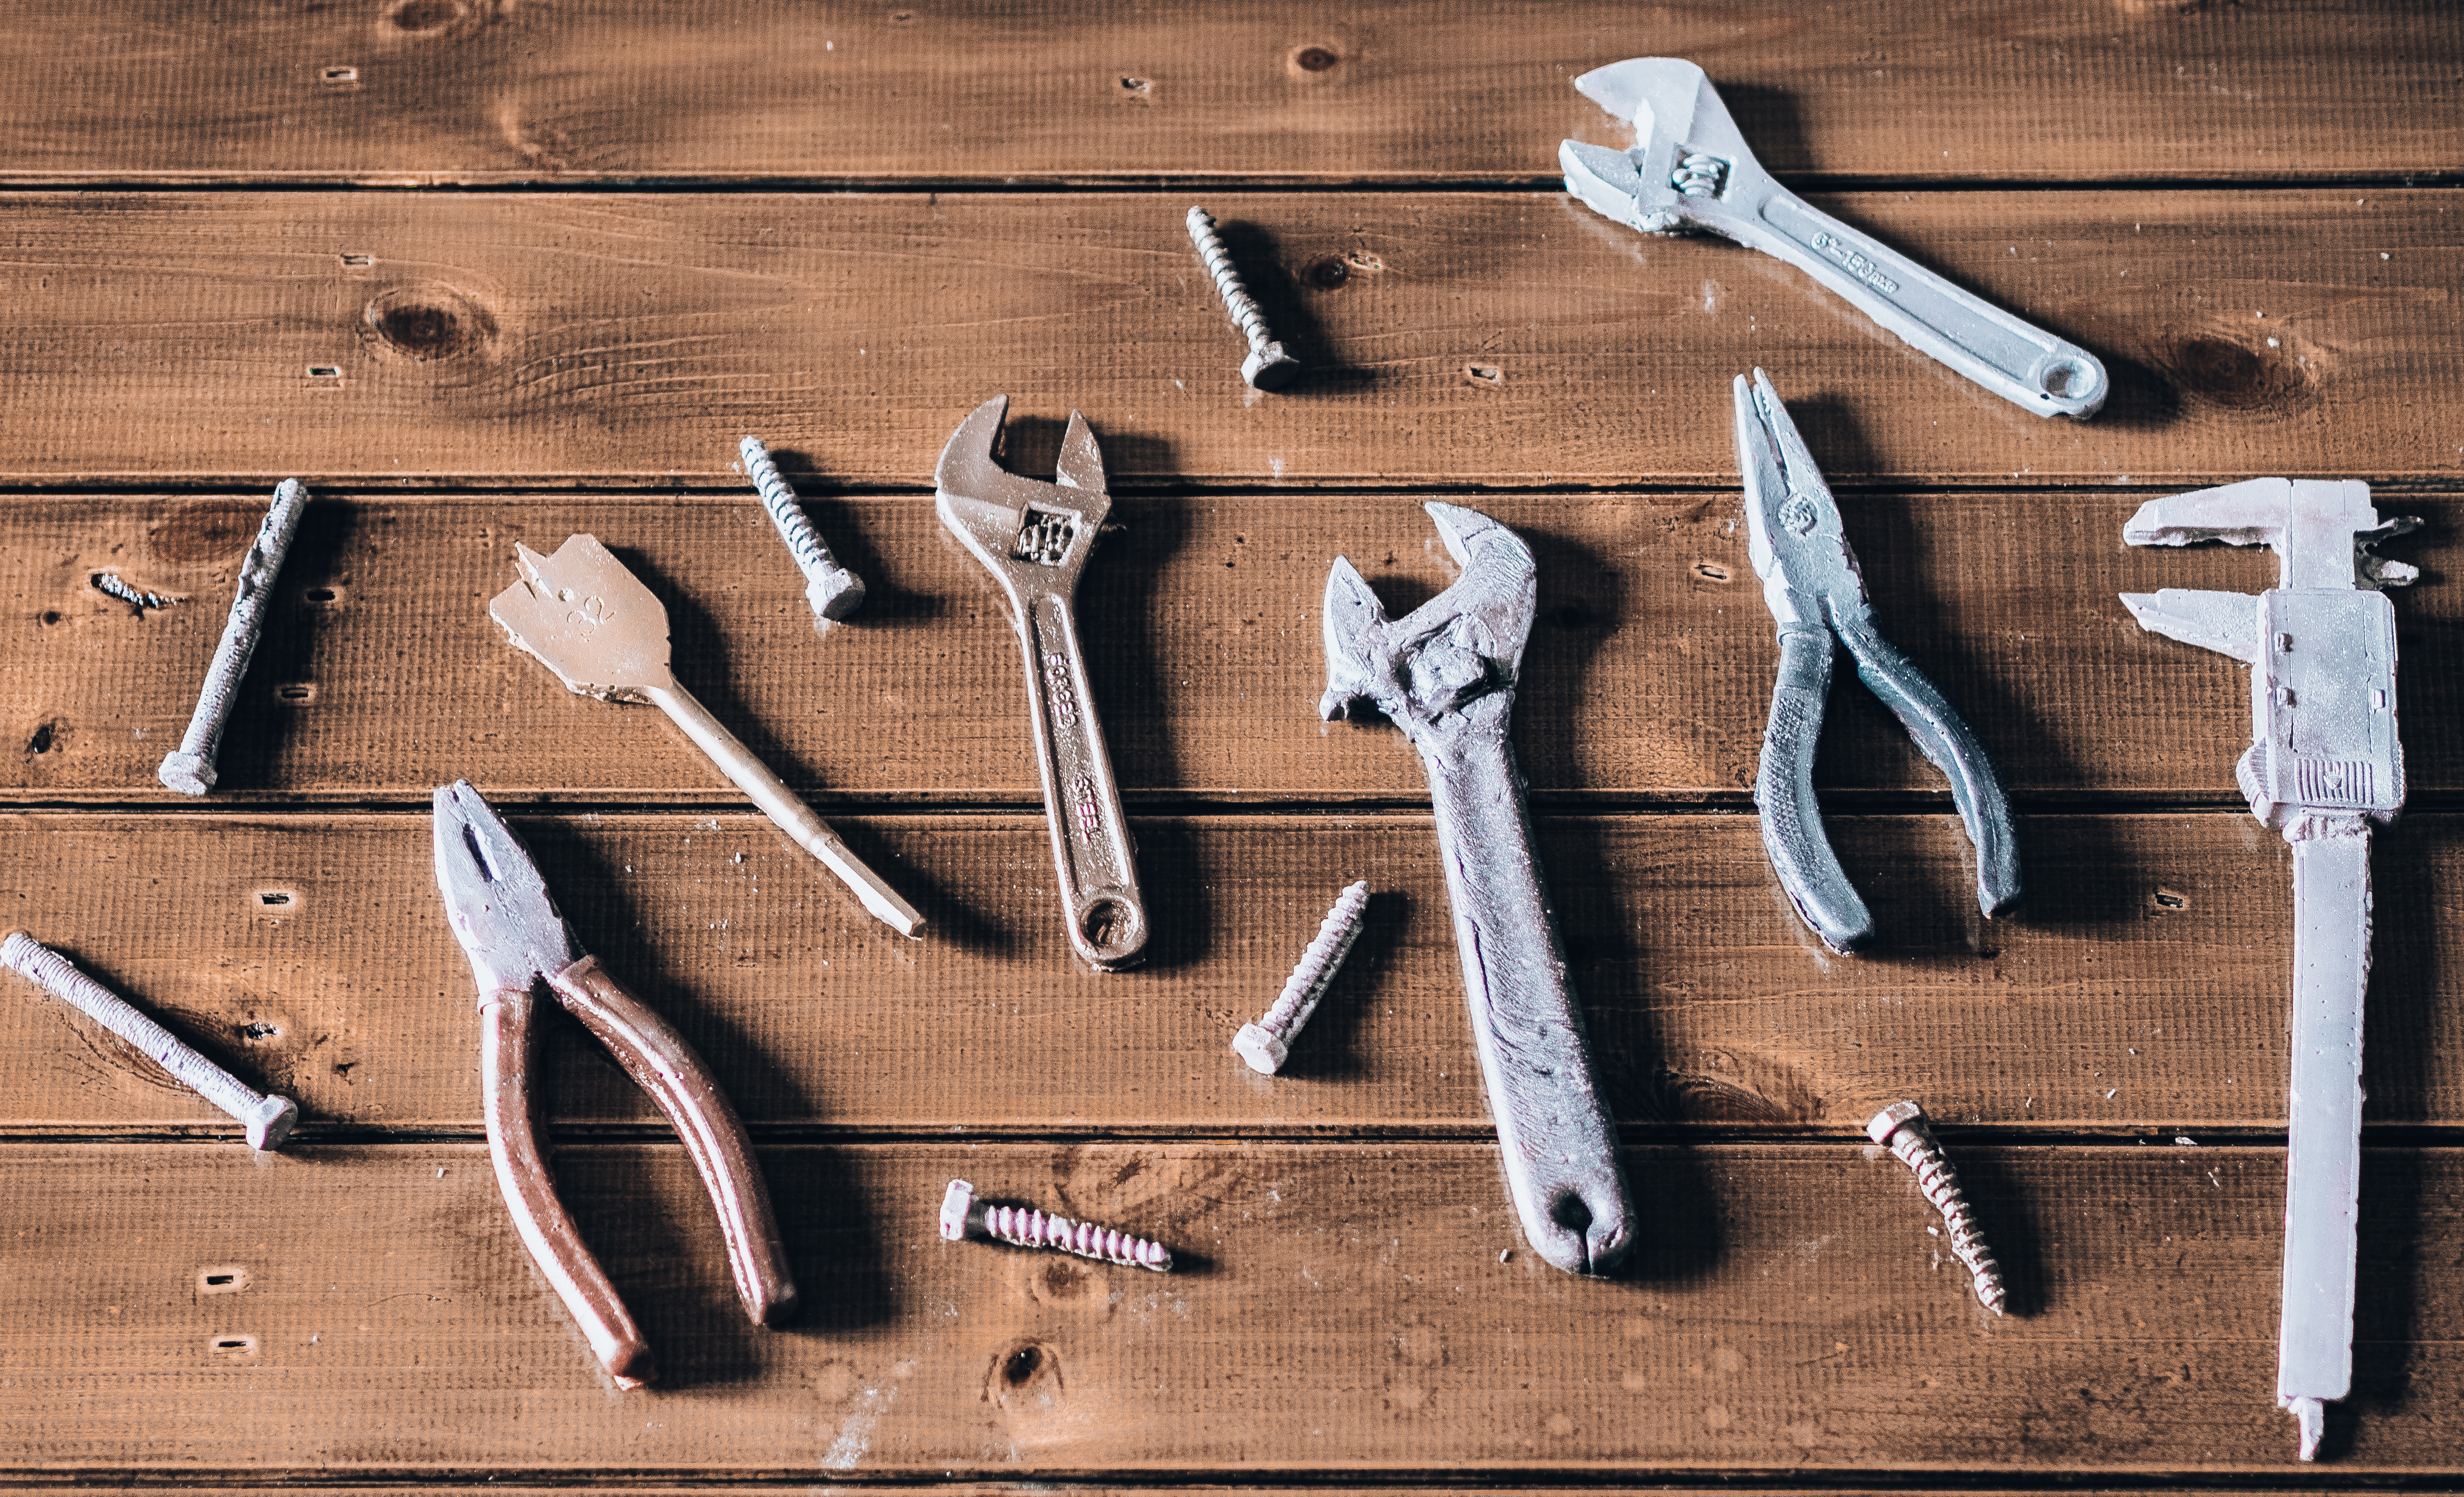
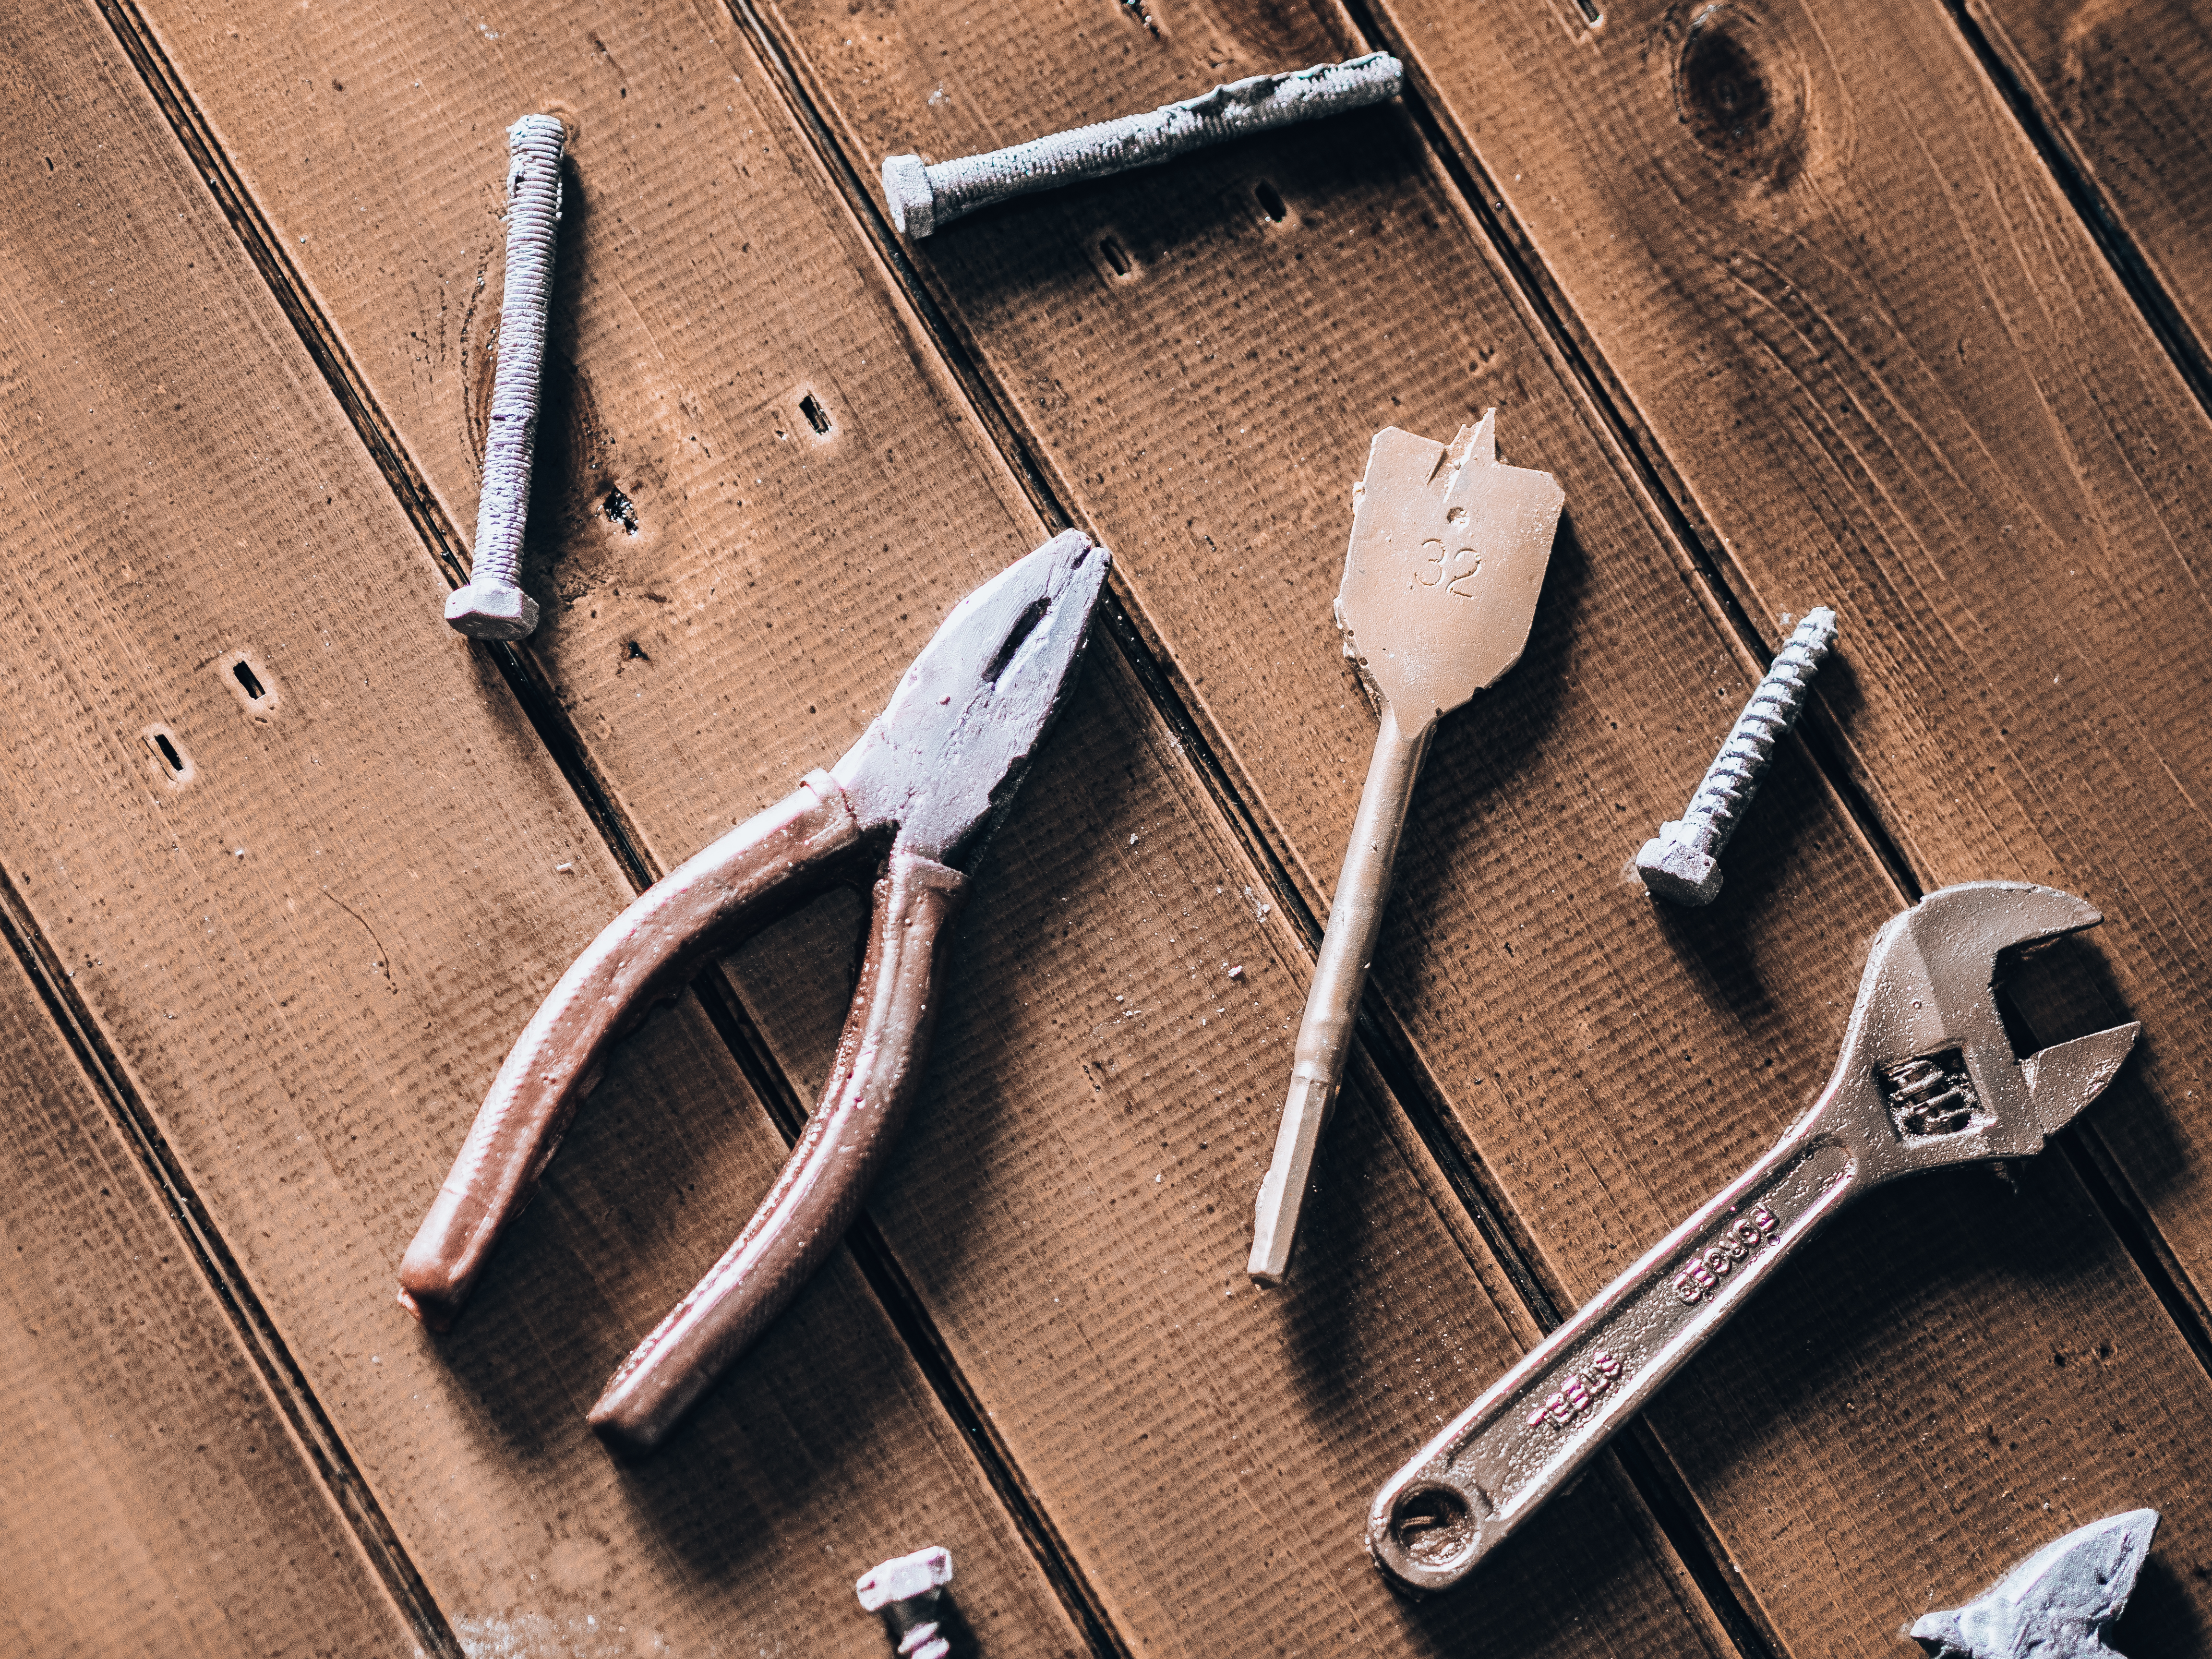
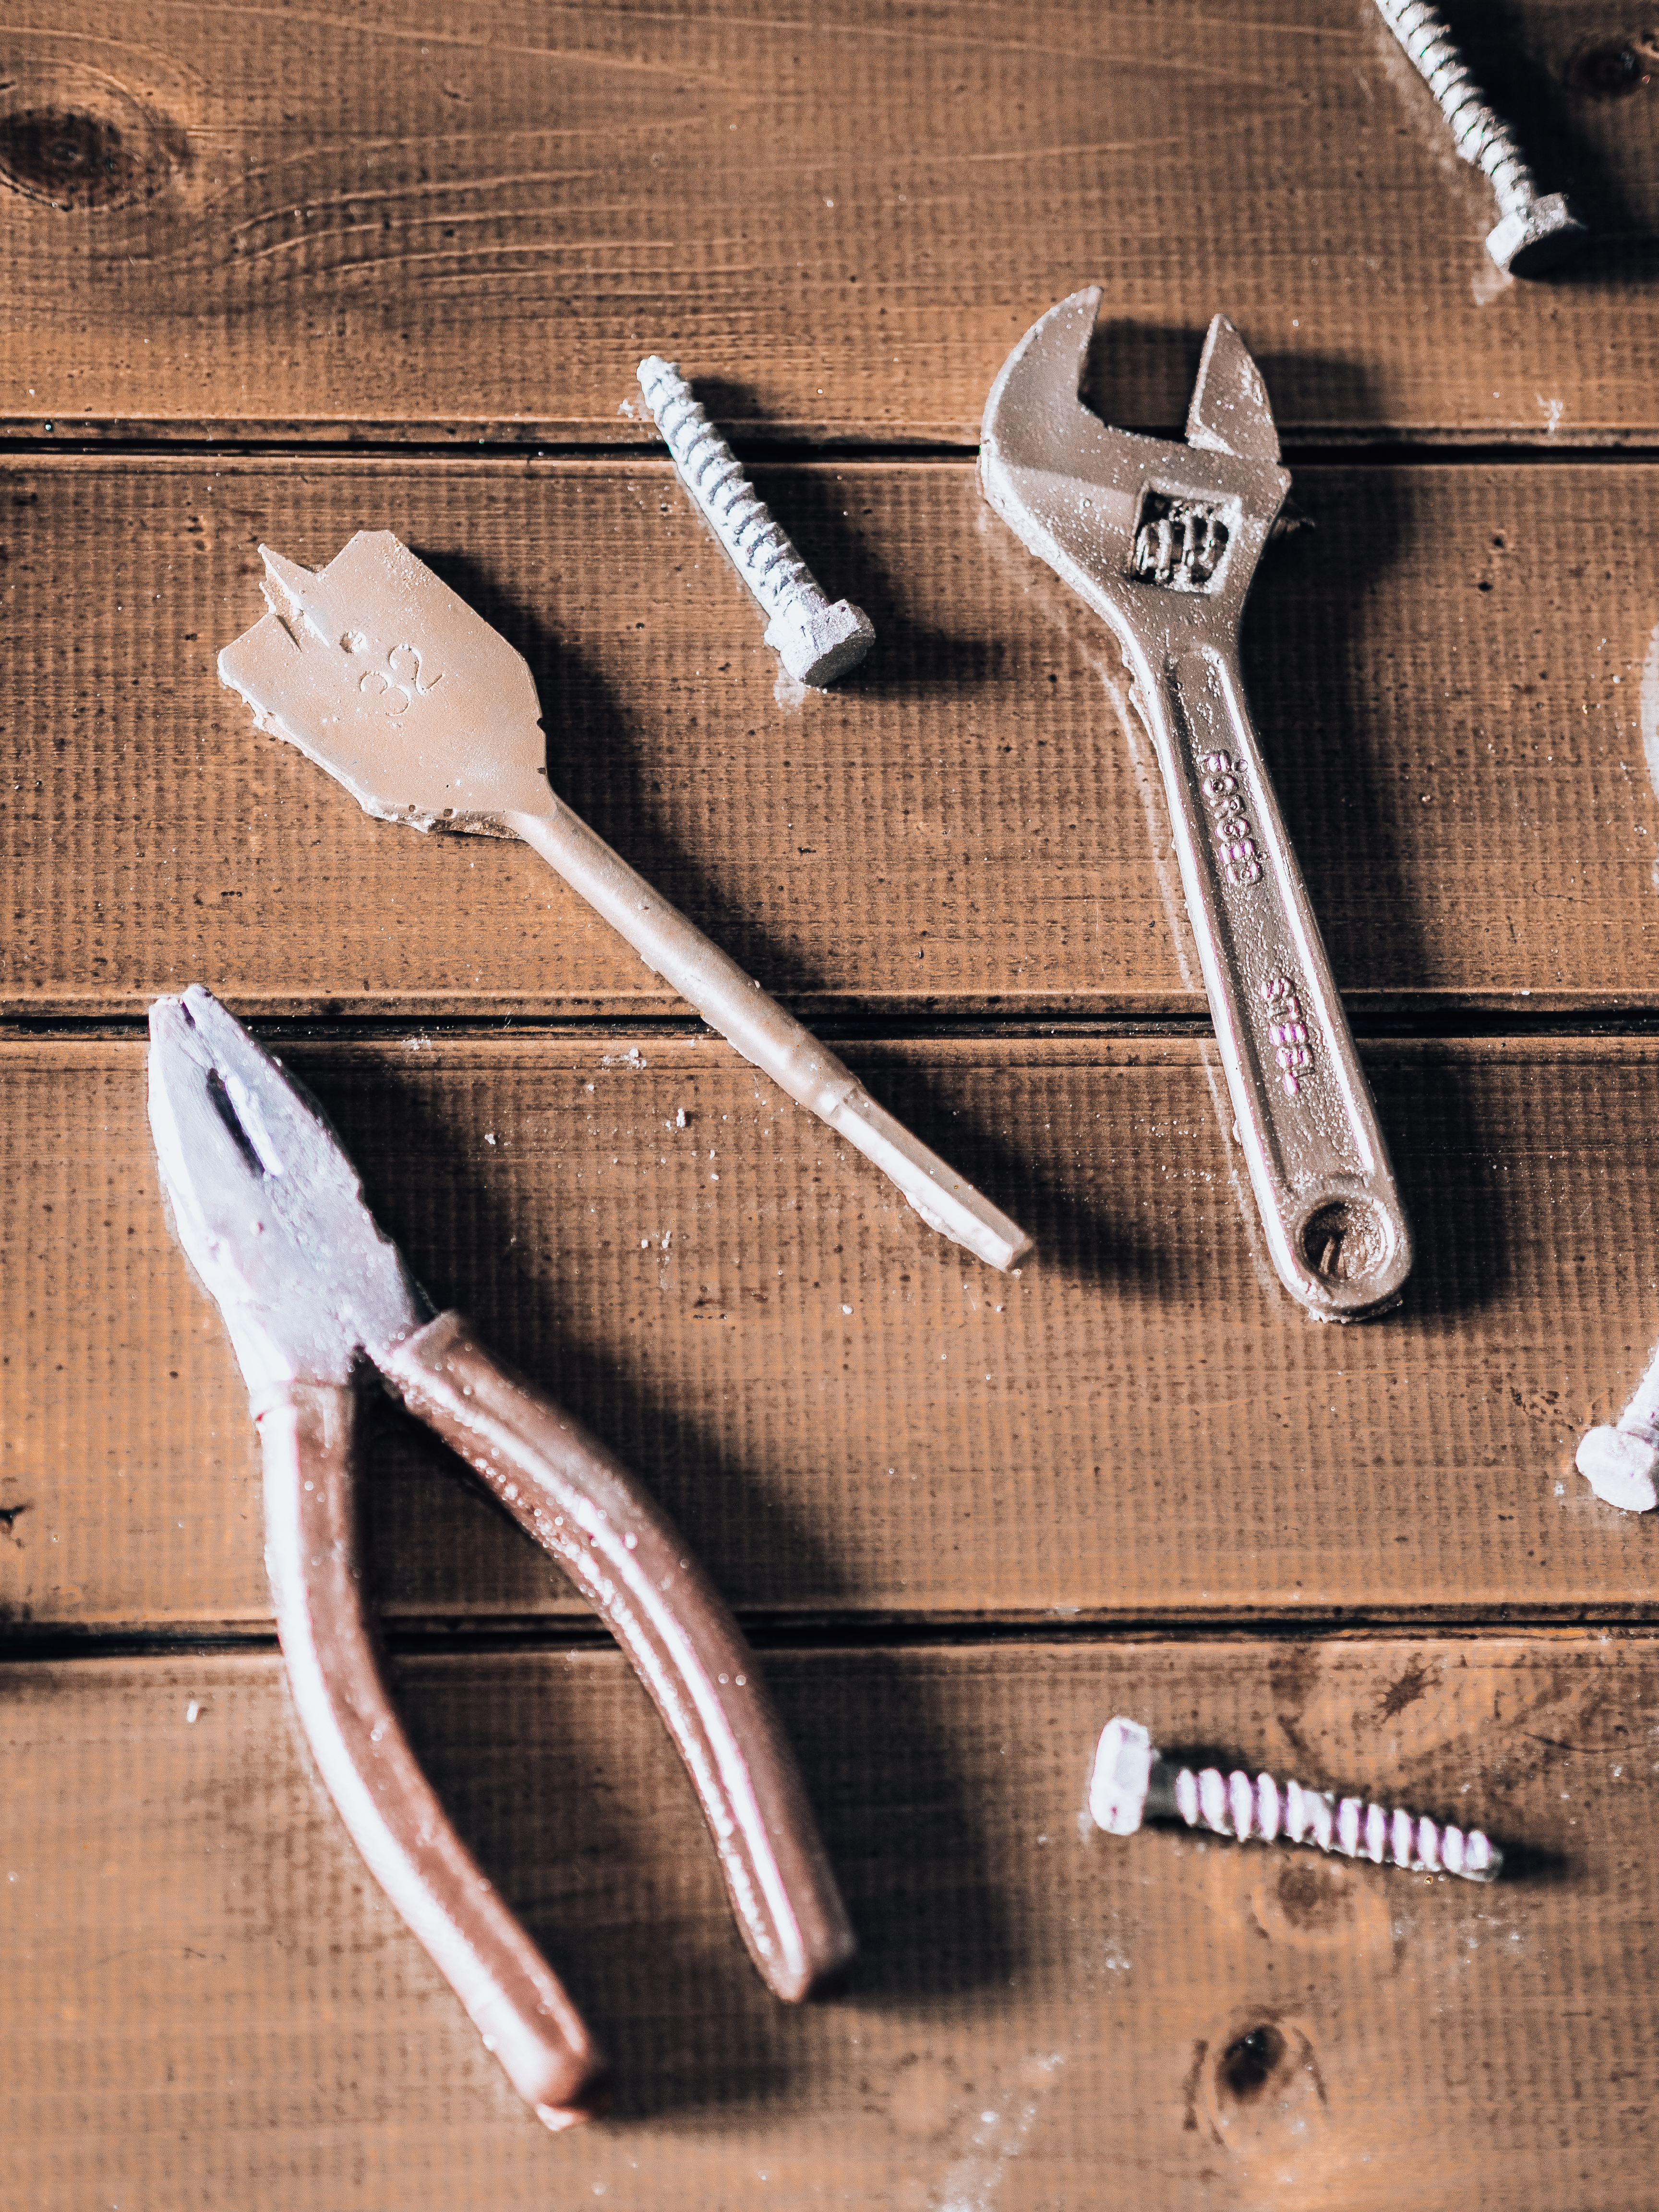
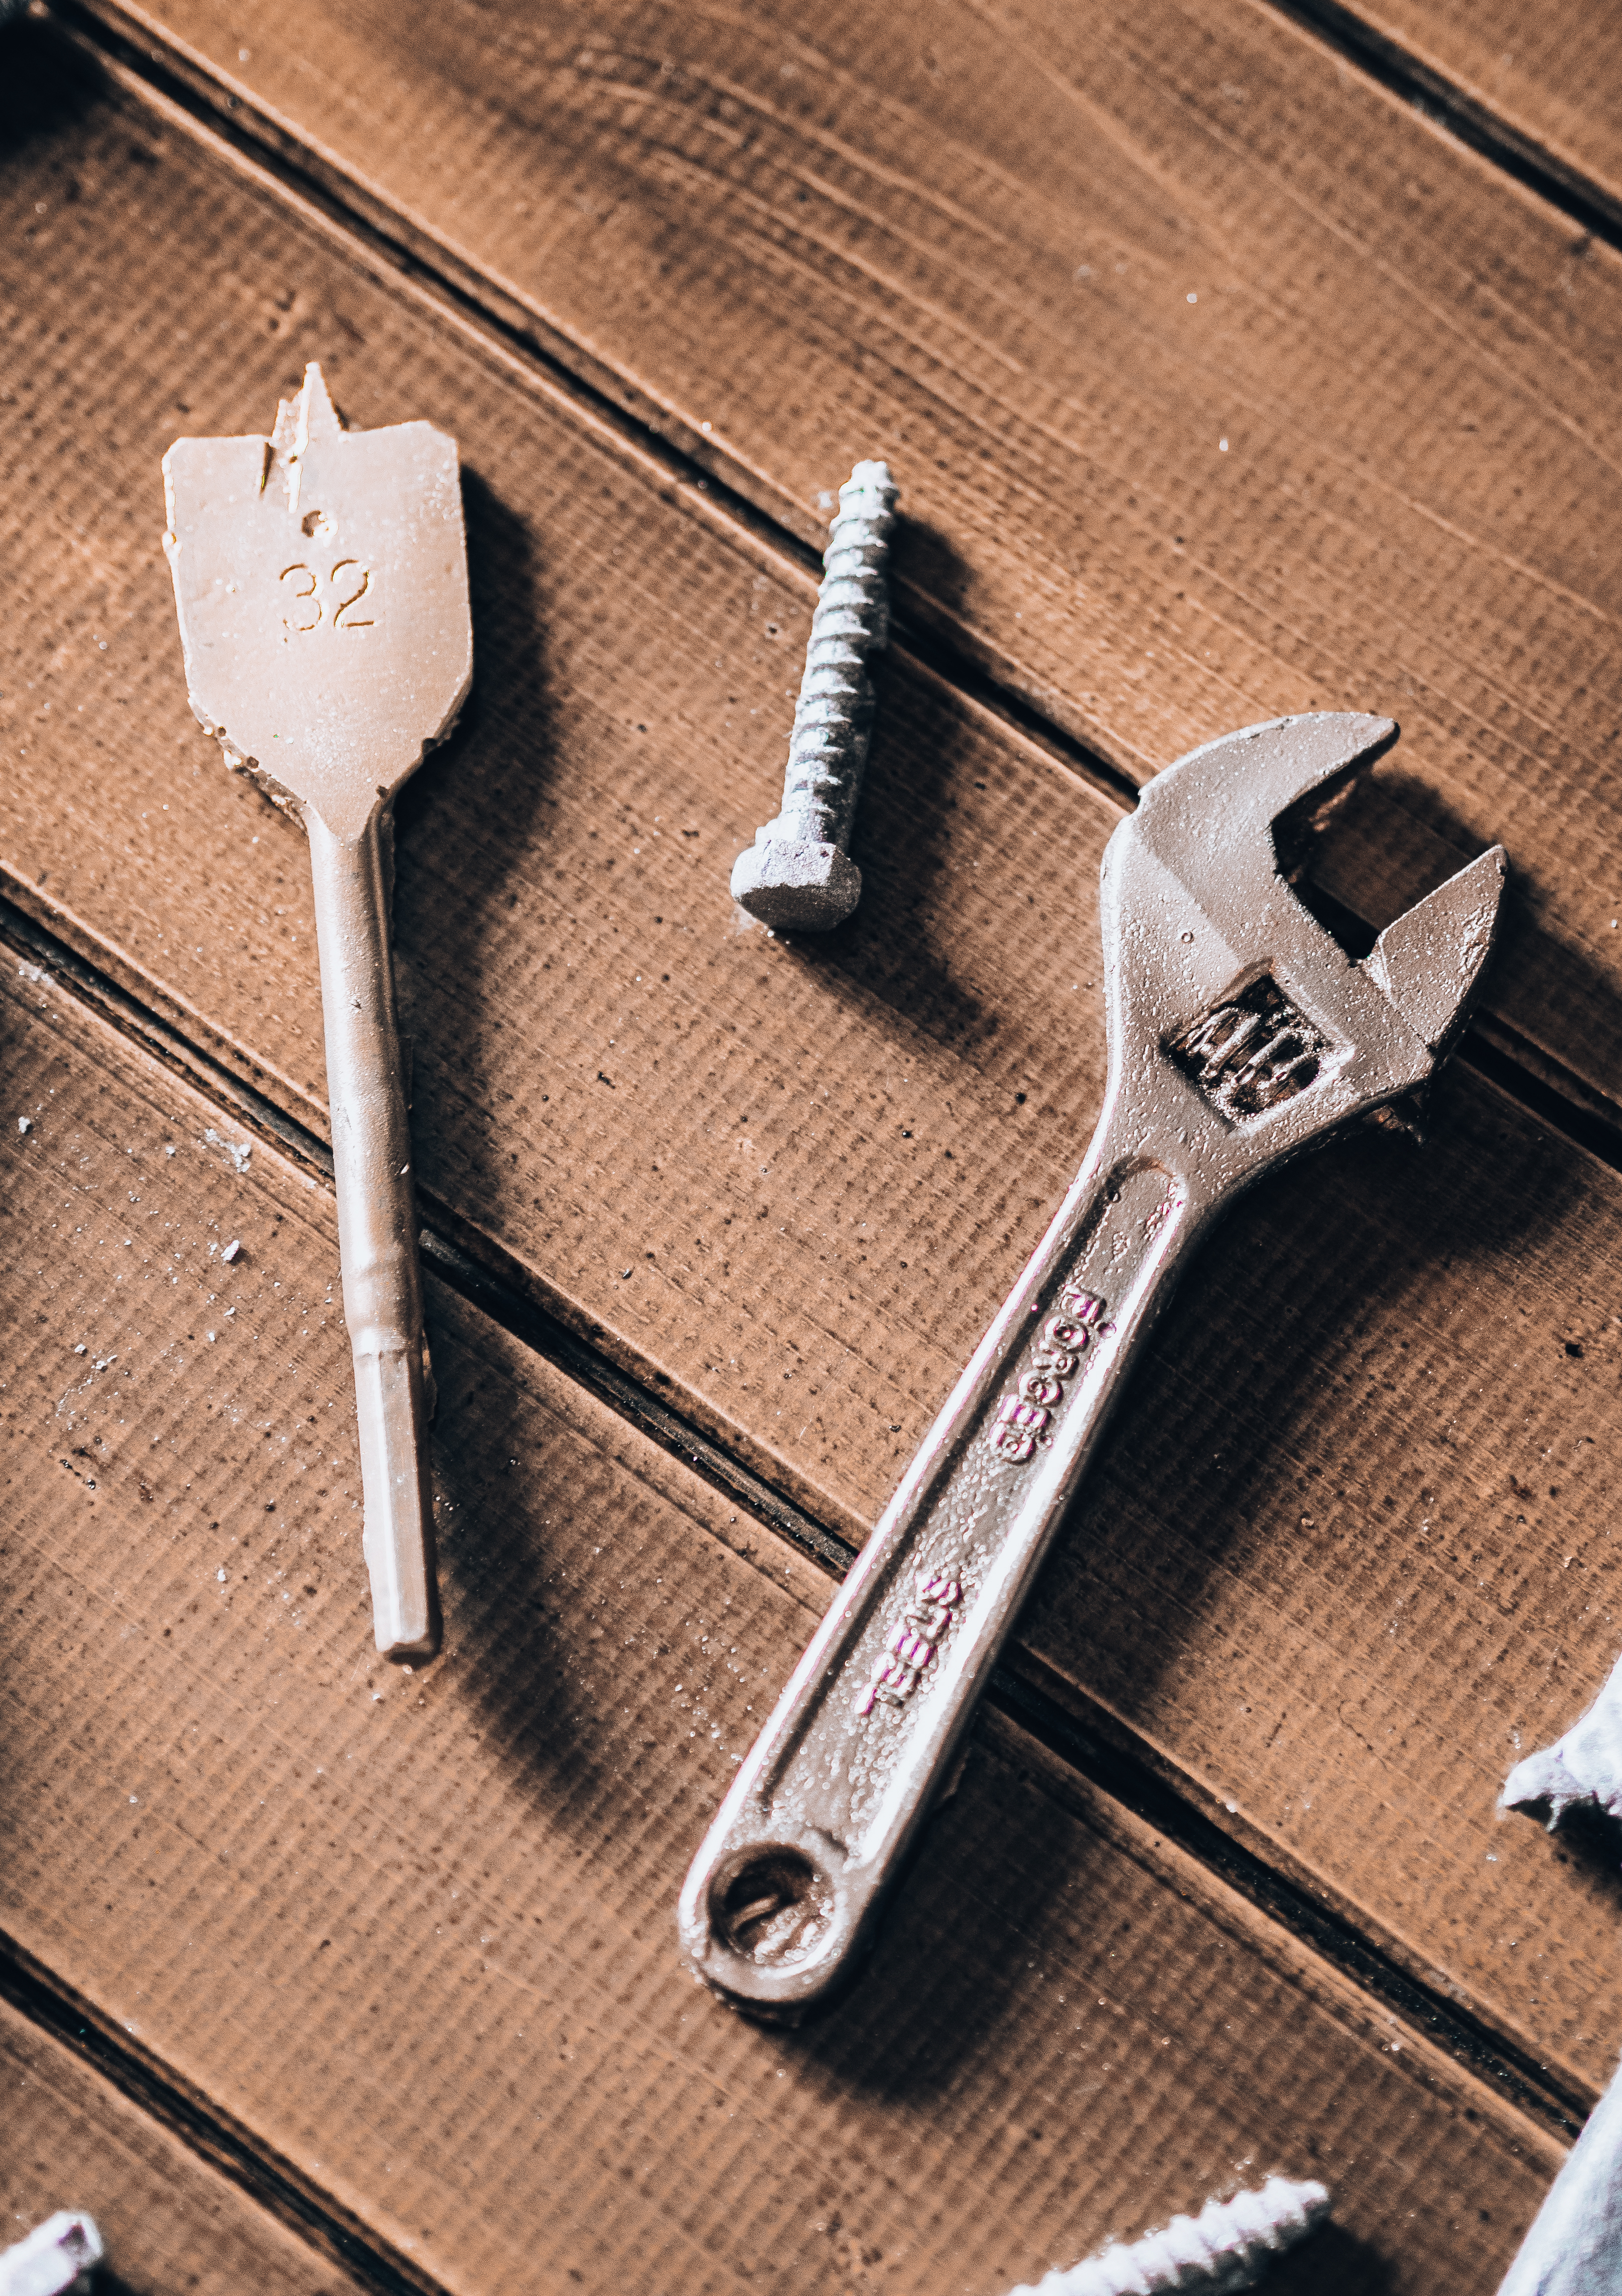
5) To make your chocolate tools look like real tools, brush them with lustre dust mixed with cocoa powder. If you want to archive a shinier look like a brand new tool, then use the silver lustre dust mix, however, if you're going to create an old, rustic tool than use the bronze lustre mix. To make tones on the chocolate deeper the parts with the powdered black food colouring, this way they will look even more real.
Use the black food colouring to darken the edges and any deeper parts of the tool to make it look more realistic.
7.) Now place your tools in your toolbox or wooden tray.


Don't worry if you break a tool along the process, it's only chocolate super easy to fix, just glue it back with melted chocolate.
There you go one present idea that he will never forget.
I hope you enjoyed it and don't forget to subscribe to my blog.
P.S: The idea was my own, however how to make it possible the credit goes to howtocookthat.
Thank you for your tutorial. To watch her video, just click here.


Such an amazing idea. I also would love tools if they came in chocolate haha
Hope your dad loves this gift!
http://www.fashionradi.com
Author
Same here to be honest:) xx
This is a great Father Day gift idea! So cute!
http://www.rdsobsessions.com
Author
Thank you ! xx