
As I mentioned in one of my previous posts even though lockdown has been extremely tough, it has been a blessing for our home.
We had to alter our 2020 plans, so we've started to work on our house again.
One of the first things we started to work on is the small room.
Even though this room is the smallest in the entire house, it had so many functions in the past.
We used it as a storeroom, guest room, office, then storage again.
The original plan was that once it's done, it will be my office for a while until my actual office gets a new shiny cover.
After that, this is where the guest room will take place.
However, soon after that, I had to realise that this is too small for a guest room with a double bed, but it's the perfect size for an office space.
So I would like to welcome you all to my office that I have been waiting for so long.
Cannot wait to decorate it all, to write all the upcoming blog posts, to edit photos and videos in my own little space but until that let me show you all how we managed to turn things around in this room.

Carl and I make an excellent team when it comes to renovations around the house.
I usually do the planning, designing, shopping side of it, and he does all the dirty works alone unless he needs either of my dad's help or mine.
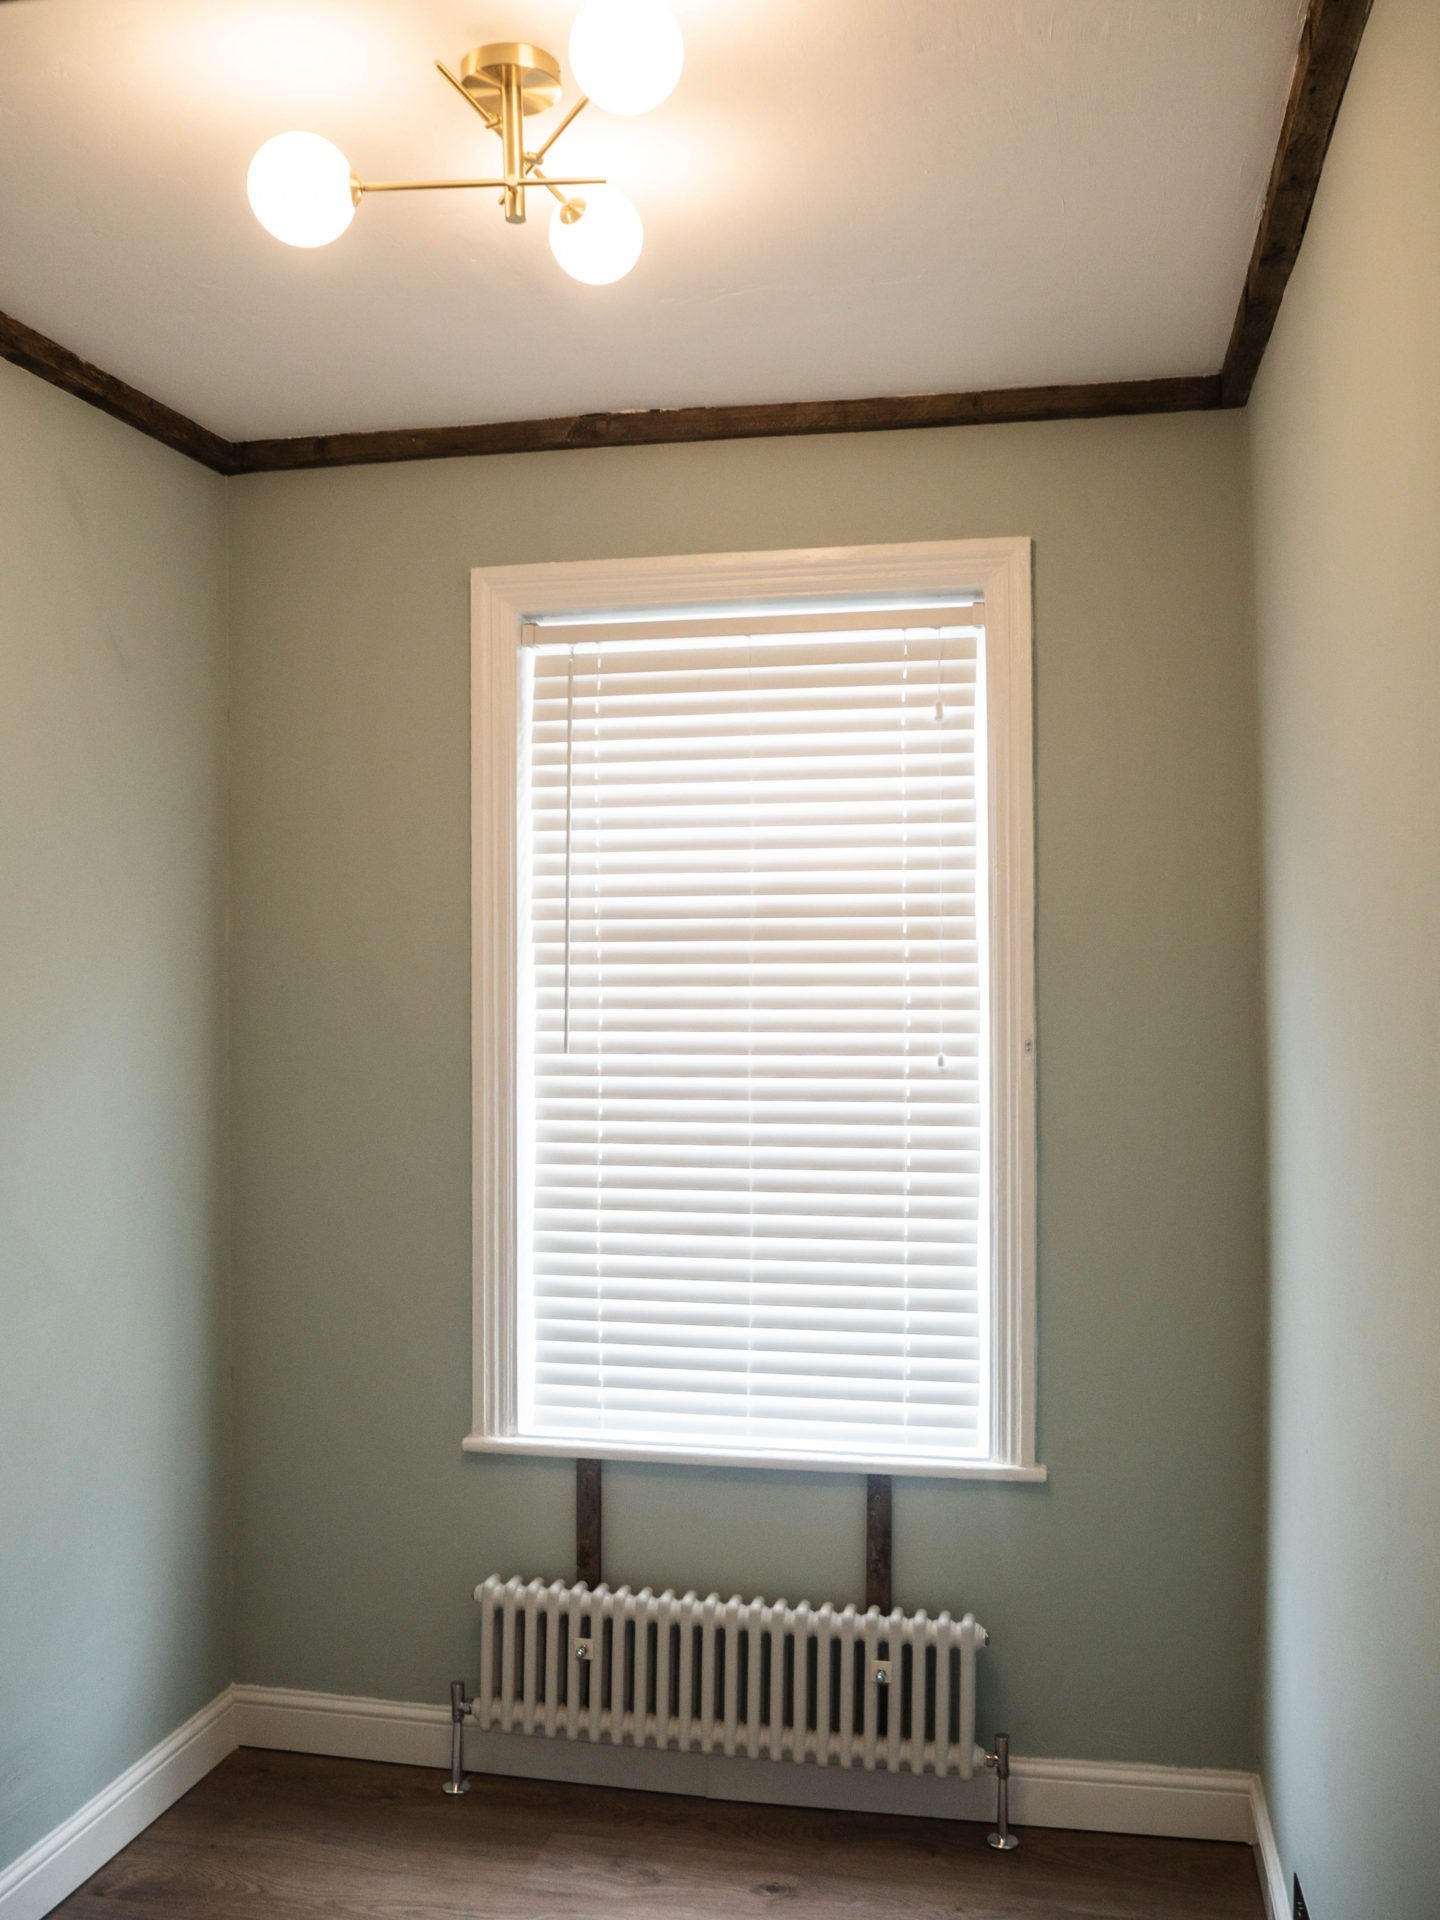
Carl started the refurbishment on the room with all the electrical works first. He was adding extra sockets, moving the exciting ones somewhere else and changing the light to a new flush ceiling light.
I've seen on Pinterest this super beautiful shiny gold frame light with six white globe glass heads, and since that day, I wanted to own one of those for myself in our home.
The idea was to buy that light for the dining room first when we planned to paint that room green, but that's another story.
Due to the size of my office, a six-headed light would have been a waste there, so I ended up purchasing a three-headed from Debenhams.
I love it so much. However, I might ask Carl to move this one to the wine cellar as I woke up with a DIY idea the other day that I want to try to make for my office.
The wine caller needs a shiny gold light anyways, so it's a win-win.

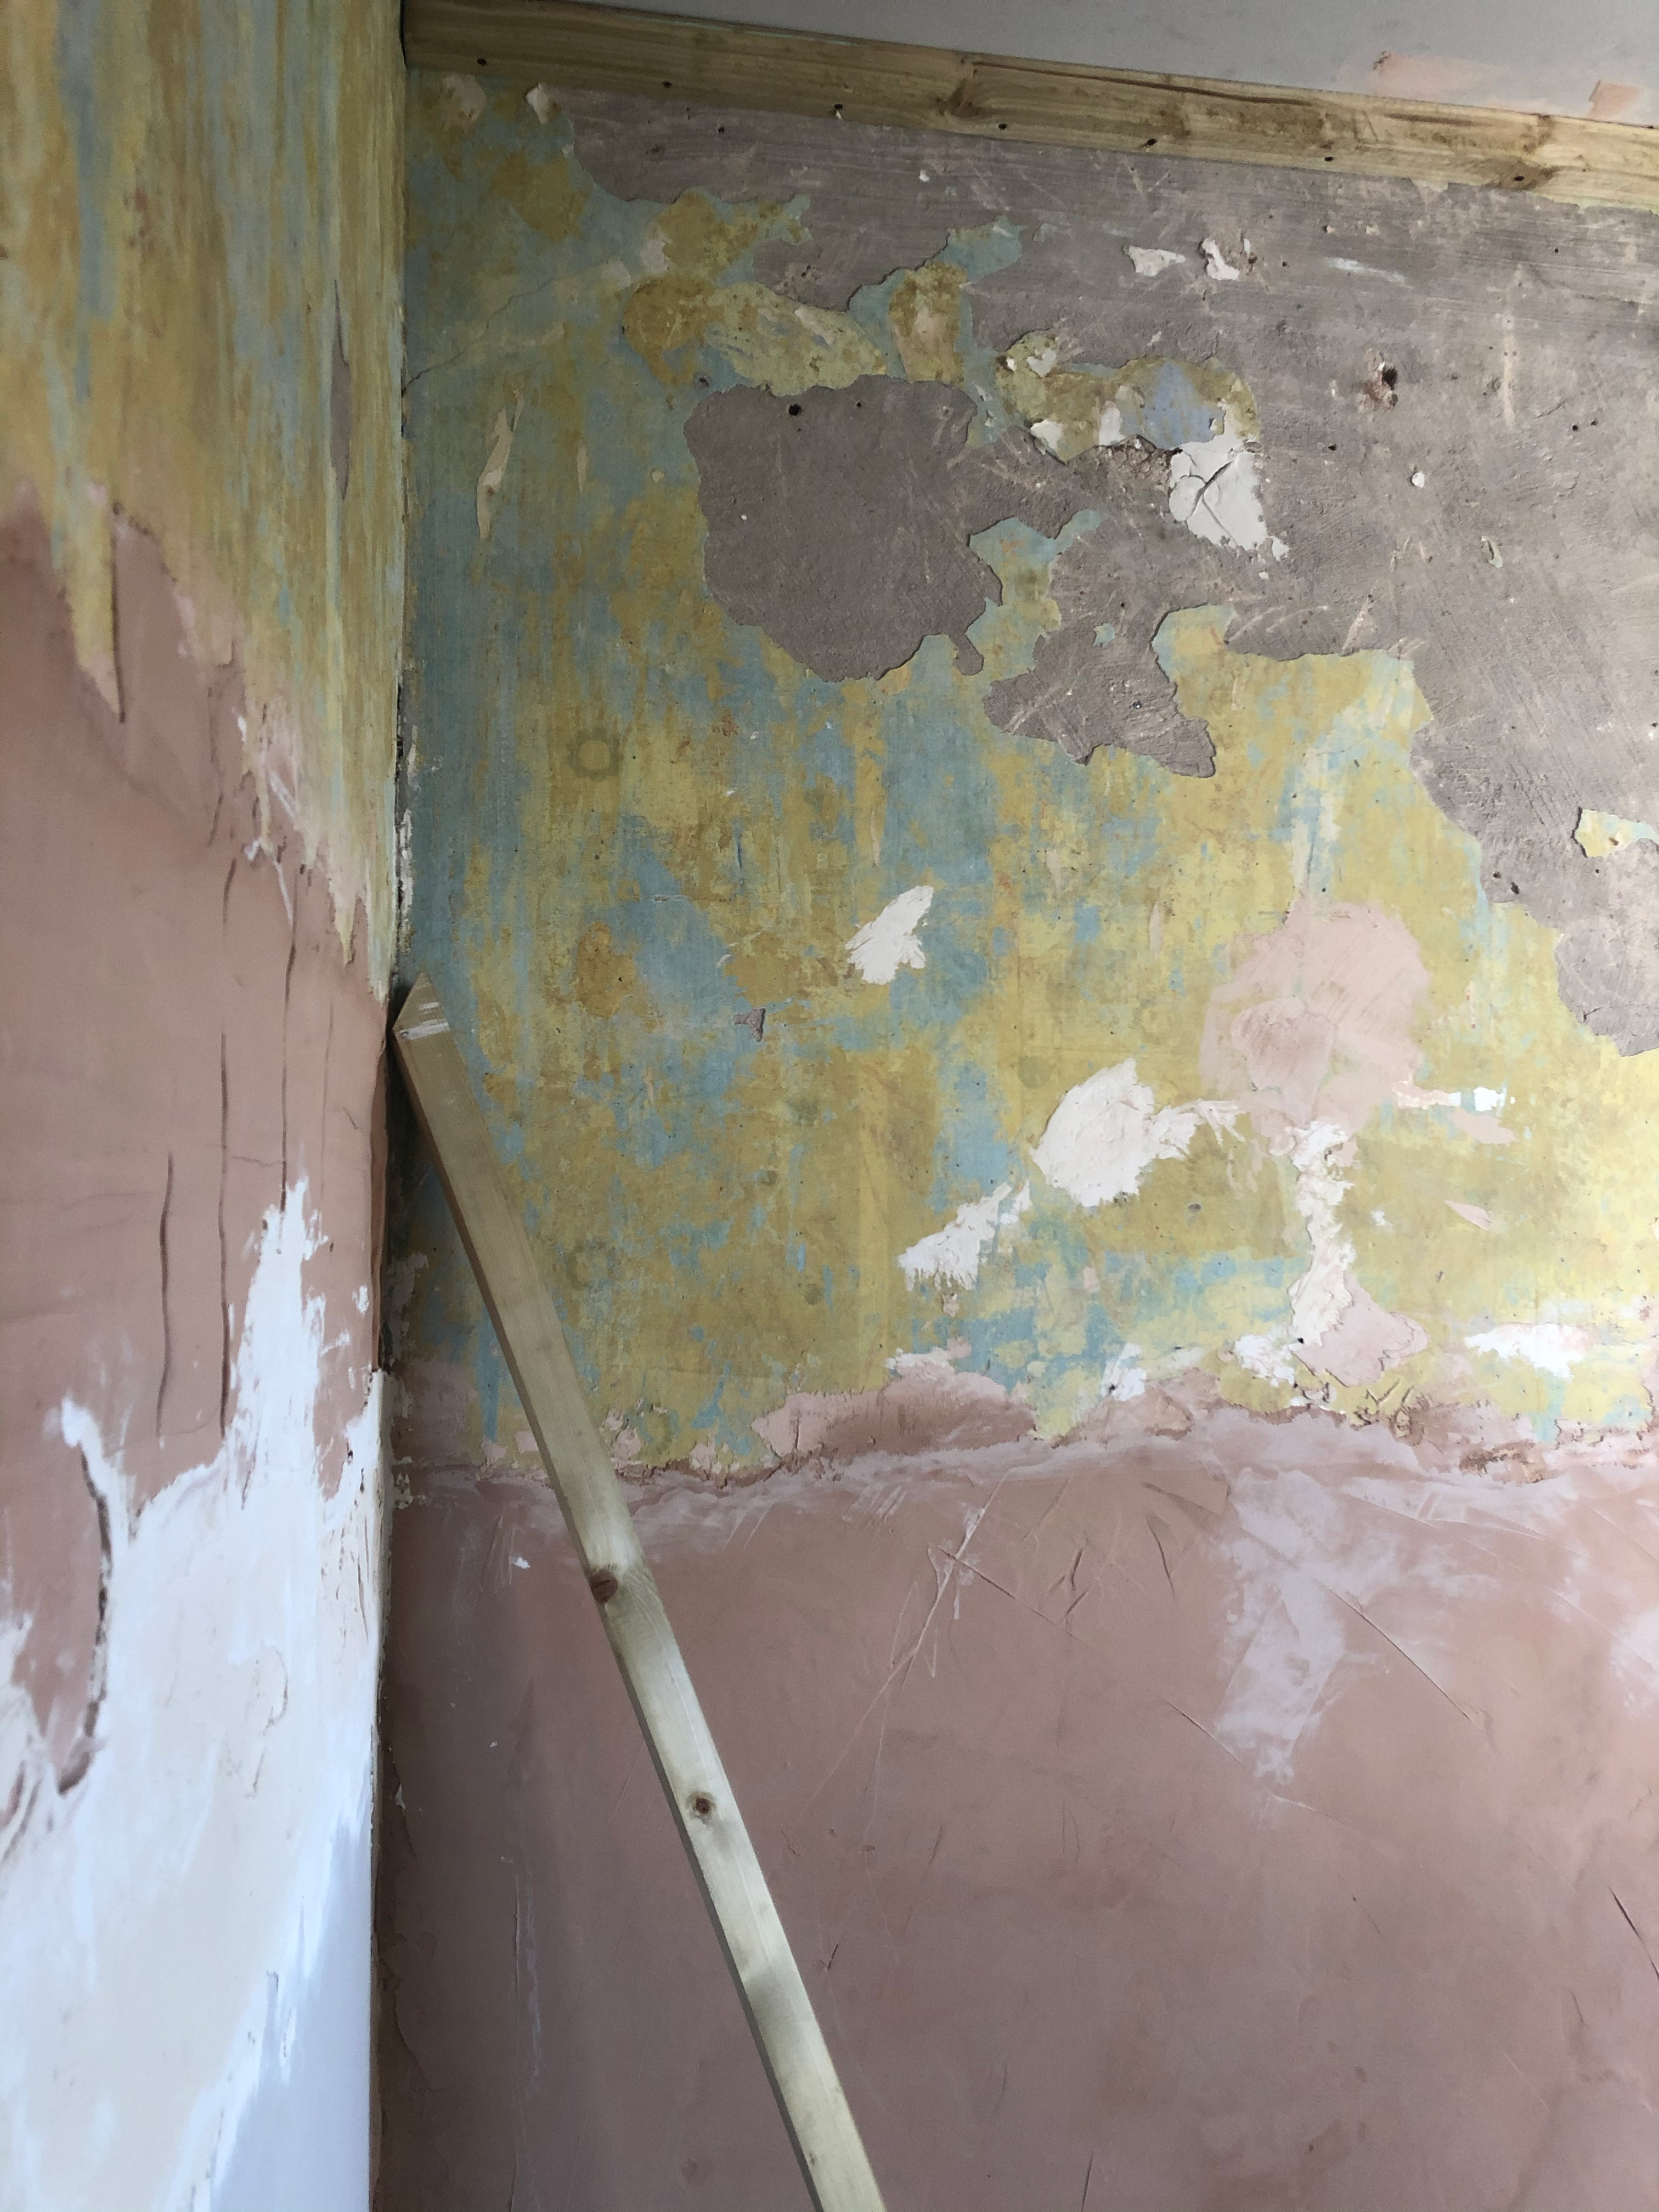
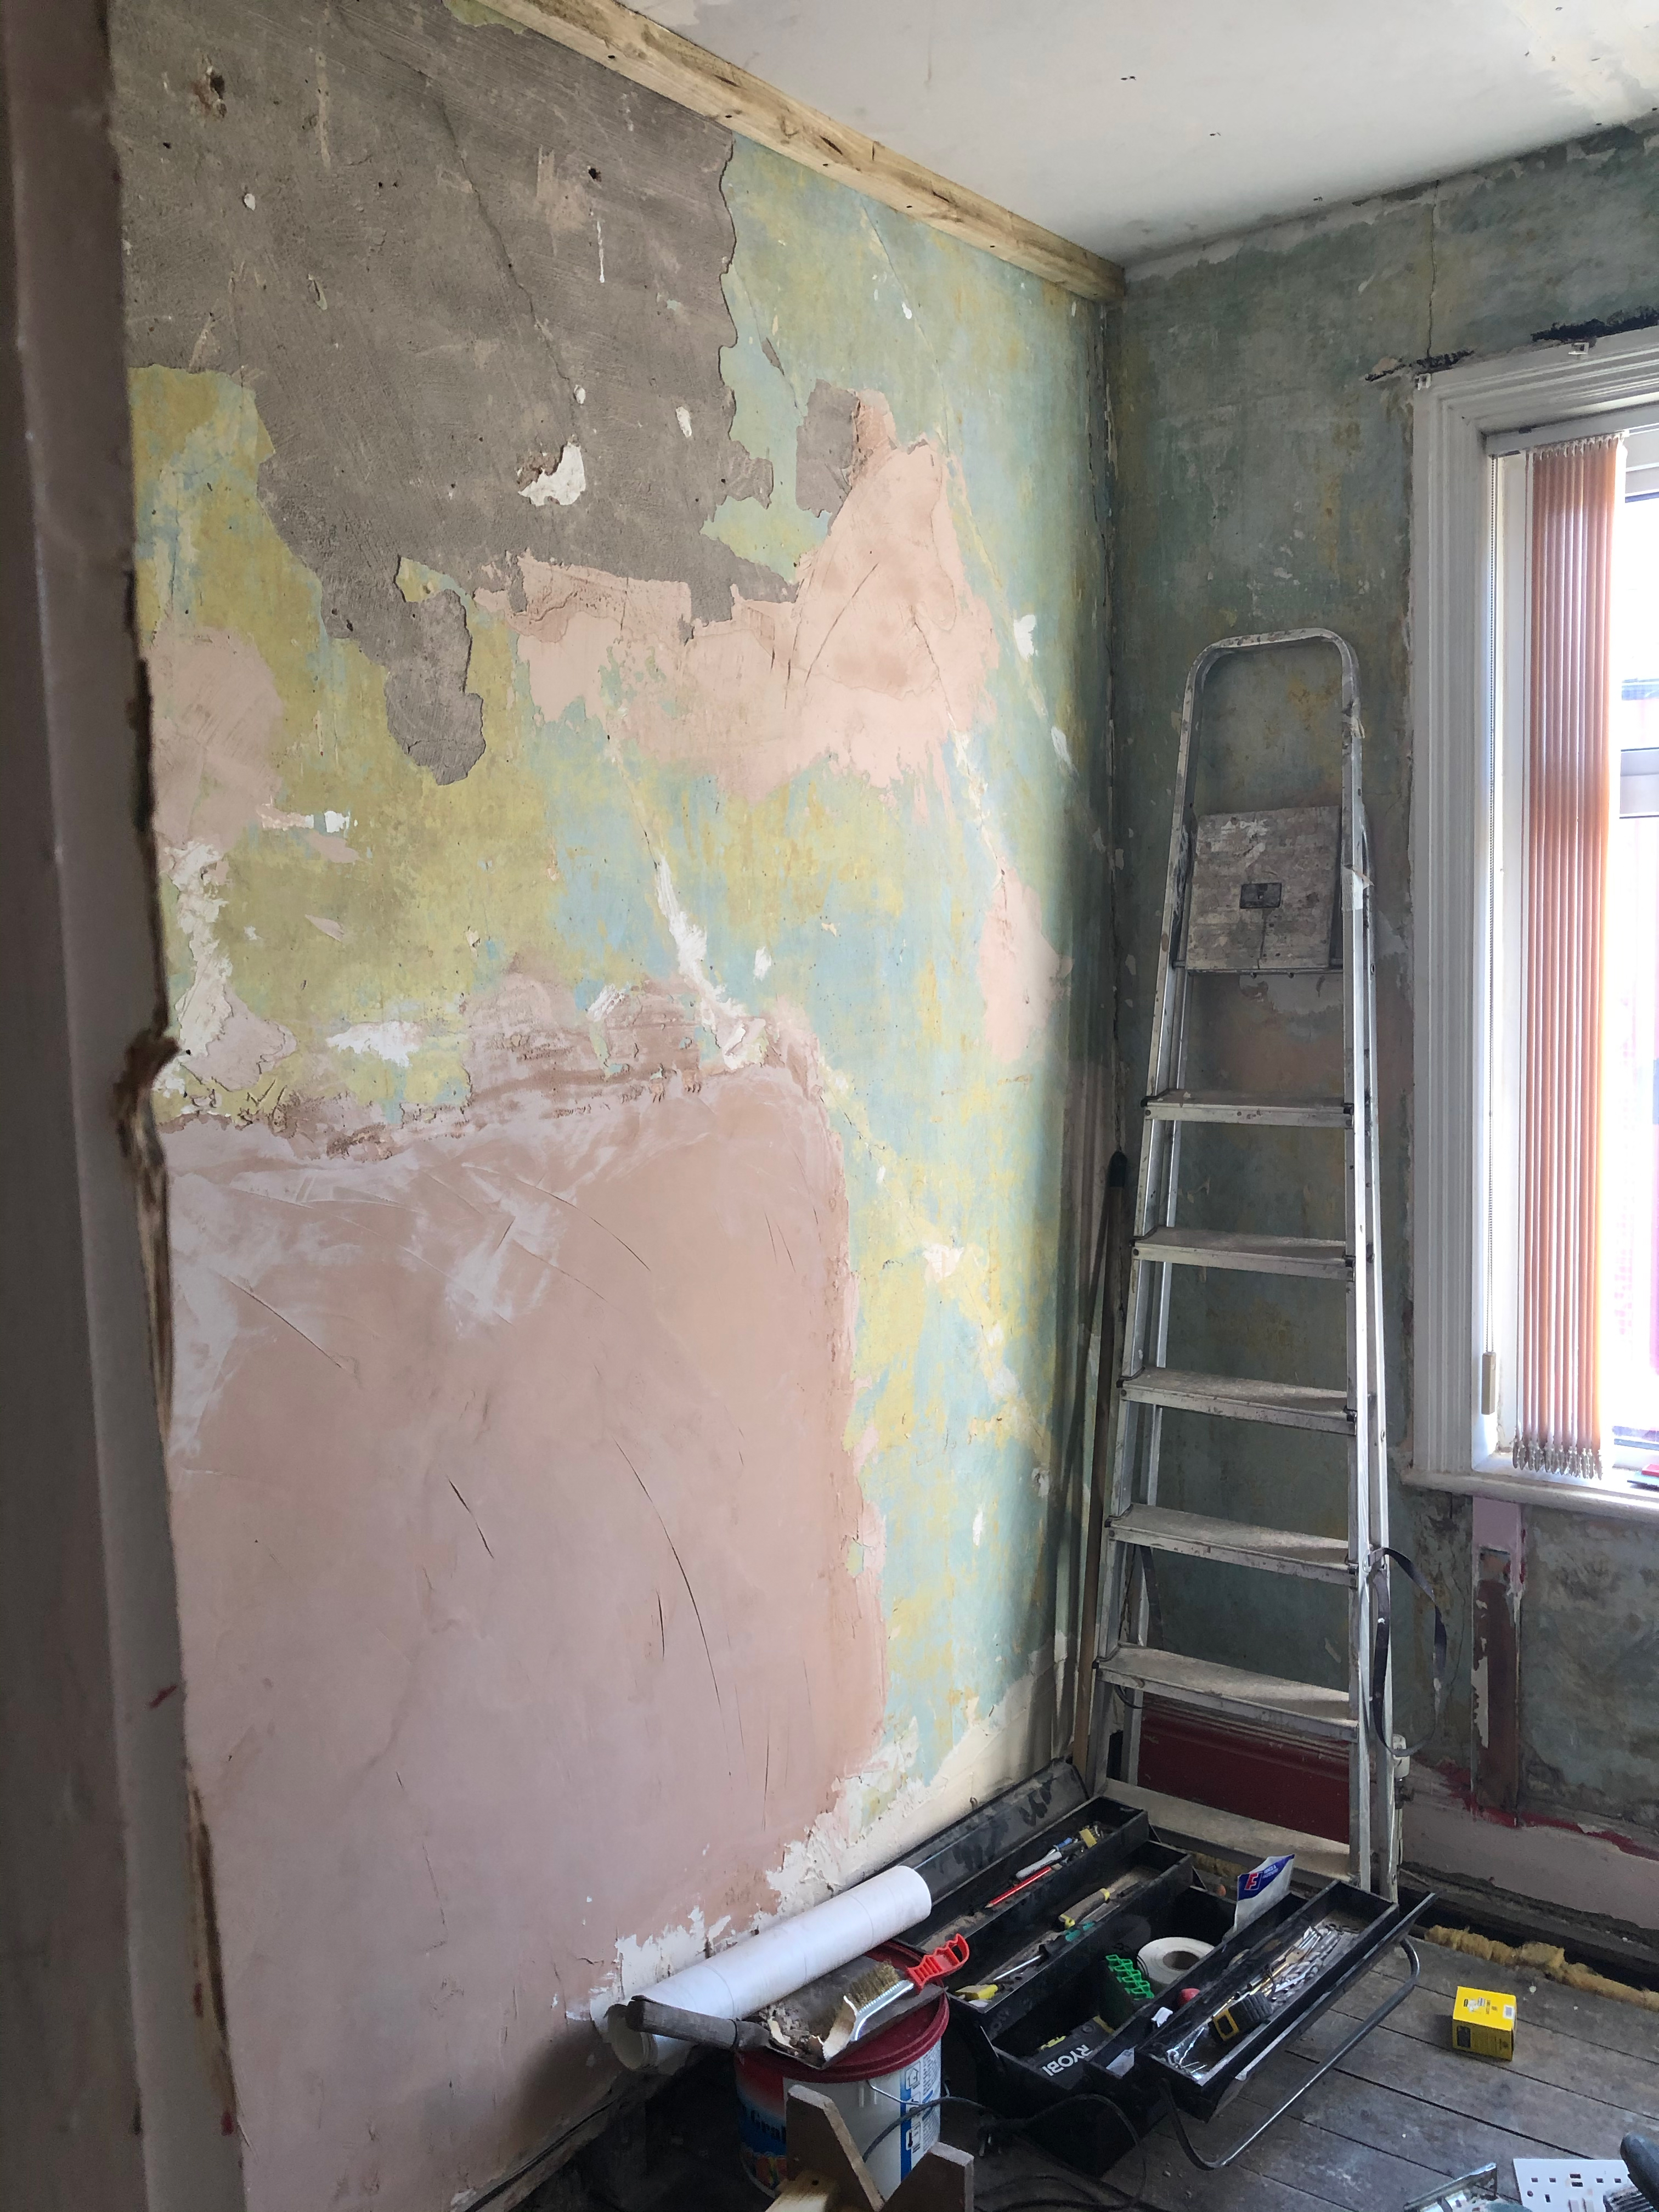
Next step was the walls. The walls were so wonky and uneven that's depressing to look at so we and when I say we I mean Carl plastered them. I'm super proud of him as he hates plastering.
We always use British Gypsum Multi-Finish plaster for any plastering job around the house.
It is a great product with excellent reviews.
It's also can be used on various surfaces, making it ideal to use on walls.
The instructions from British Gypsum (BG), state that you should use 11.5 litres of water per bag of plaster.

Once the walls were plastered, Carl fitted the new radiator.
OMG, I cannot tell you all how long it took me to find this awkwardly sized cute radiator, but at the end, I managed to find it on eBay.
It's a cast iron radiator with chrome valves. Once we were at a restaurant, I saw these beautiful cast iron wall brackets that were holding this antique victorian radiator up. It was such a beautiful pairing that I wanted something similar in our home.
Luckily I found this cast iron radiator wall brackets also on eBay.
Nothing like that antique radiator in the restaurant but it is unique.


On the same day, we prepared the flooring together by laying down the underlay. The next day Carl did the flooring on his own by the time I got home. We purchased the laminates from Wickes this time.
The click-together joint system makes laminate flooring relatively trouble-free for anybody to install.
The planks can be easily cut with a hand saw or jigsaw, circular saw if you prefer power tools.


The next thing on the list was the painting. I usually do the painting jobs around the house just because I simply find joy in them.
Carl told me before we started this room that he will do the whole room on his own, so this can be part of my birthday present.
So I stayed out of it this time. He used Valspar paint on the walls and Dulux on the woodworks.
I wanted to create a room that feels fresh, optimistic and bright.
So I narrowed my options down to green tones. I like to use dark colours, but this room is only about 6 square meters which makes it impossible to use a dark shade as the base.
Due to this, I decided to go with mint green.
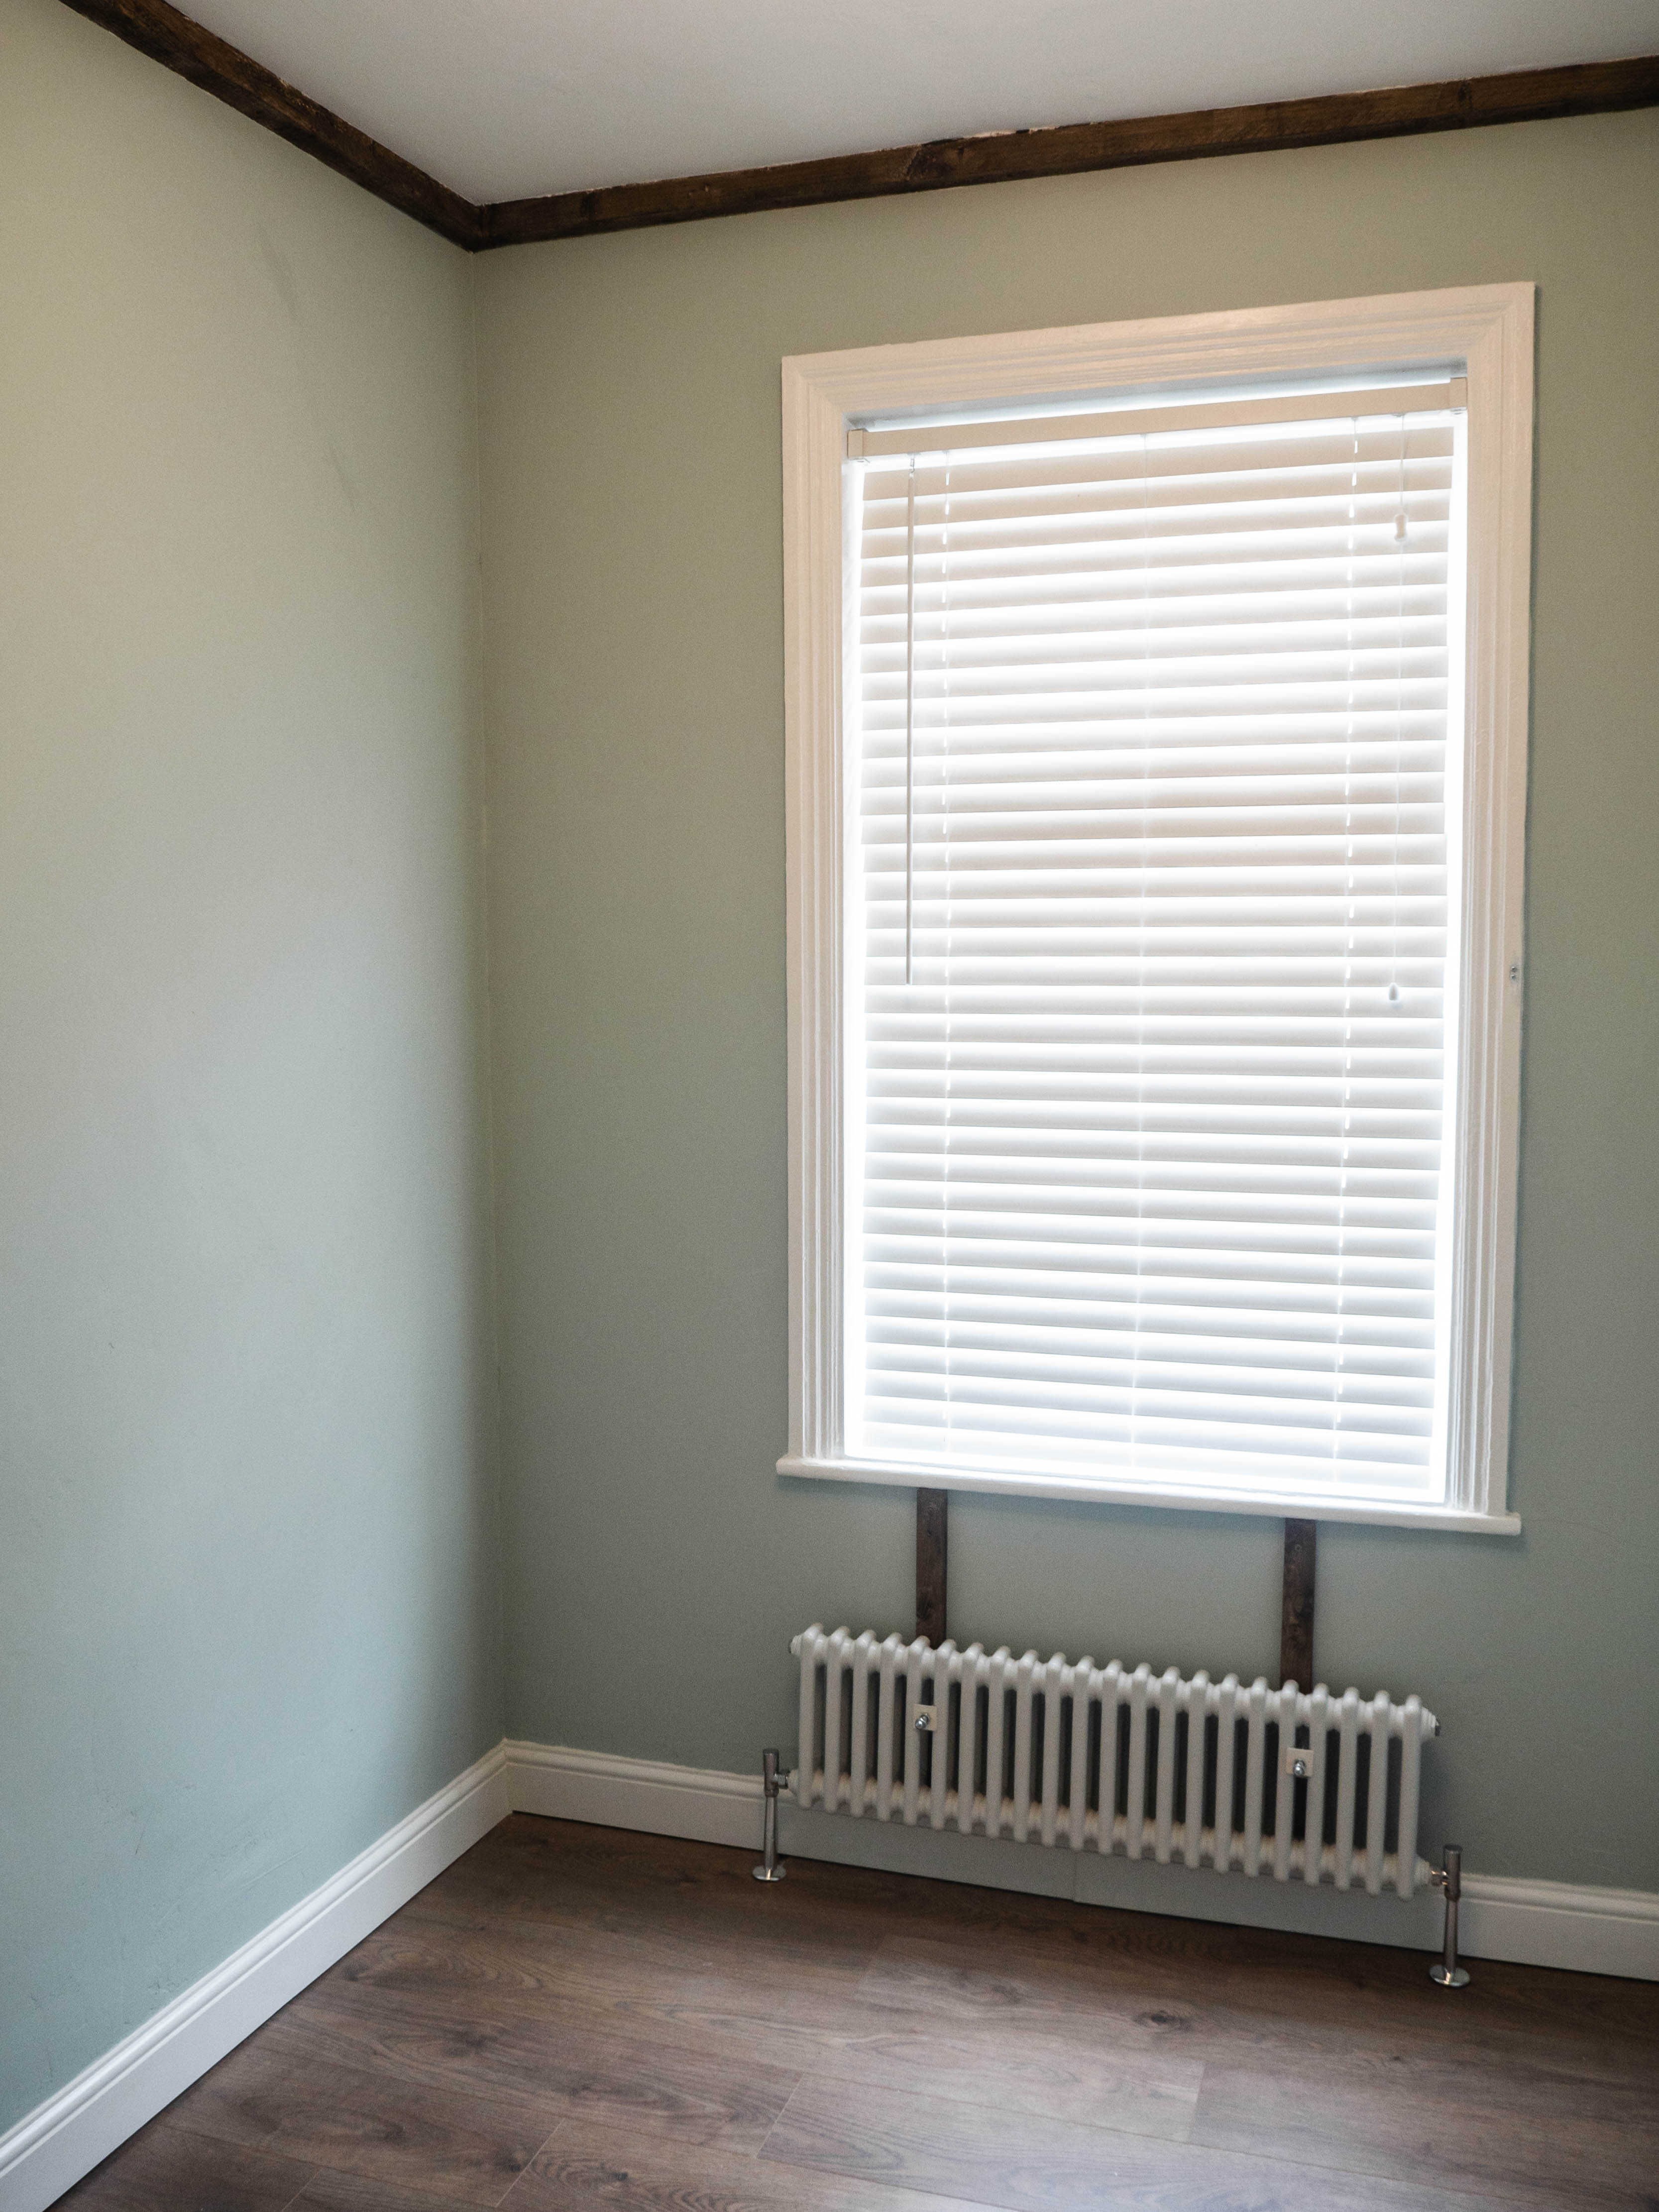

We left the original window with the frame in and just refreshed the white painting on it with two coats.
Of course, first, we took the old paint off sanded the frames and filled any of the cracks in with wood filler.
Unfortunately, the old skirting boards were damaged during the years, so we had no other choice then removed them and fit brand new ones on. This was actually our last bit work in this room.
Due to the long delays in the deliveries, the whole room was complete in four weeks.

The first time I saw the walls after we stripped the wallpapers down, I literally was about to cry my eyes out. It had about 4-5 layers of wallpapers. There are no words to describe the state of the walls once we removed them all.
That point I would have never imagined that one day this room will look this beautiful.
Thank you, Carl, for your hard work again. I'm so happy with my office.
Now it's my turn again to plan the next steps and to turn this space into my little own happy place with a bit of drama.
To follow our renovation projects, you can click here to follow our home account.
See you next time ! x


